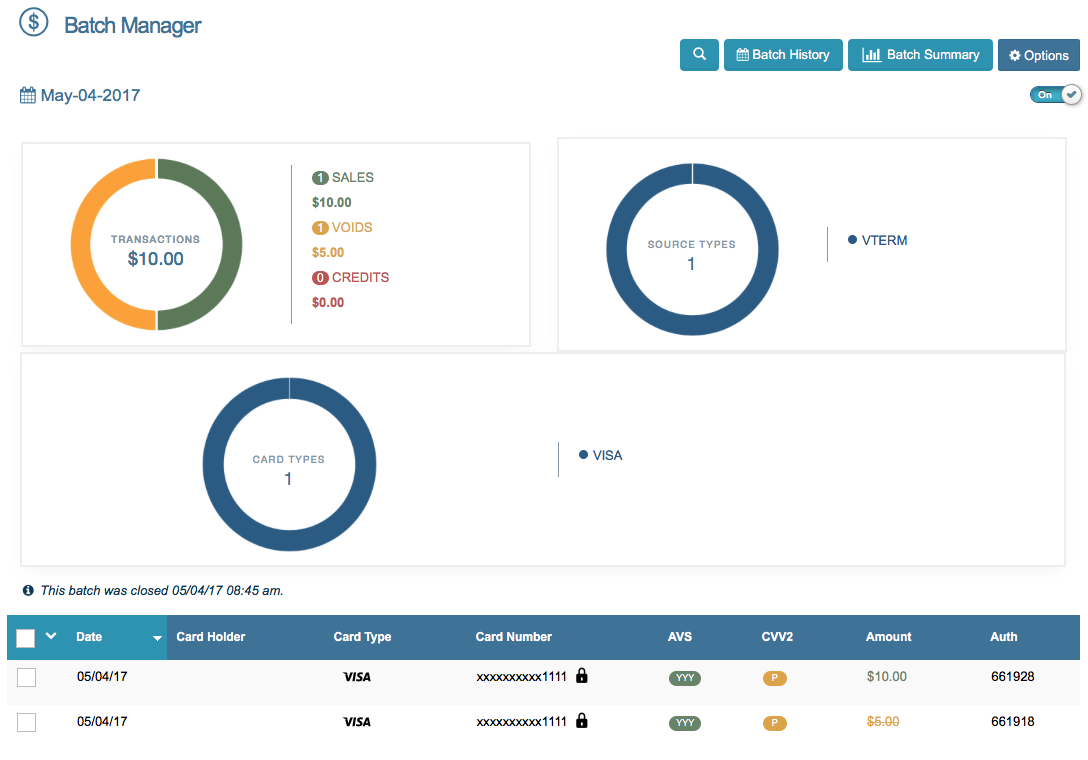
Batch Manager
The Batch Manager is considered the most important section of the merchant console. This is where all your successful debit card and credit card transactions are stored. If a transaction has been declined or received an error, it will NOT be placed into a batch and therefore will not be in the Batch Manager.
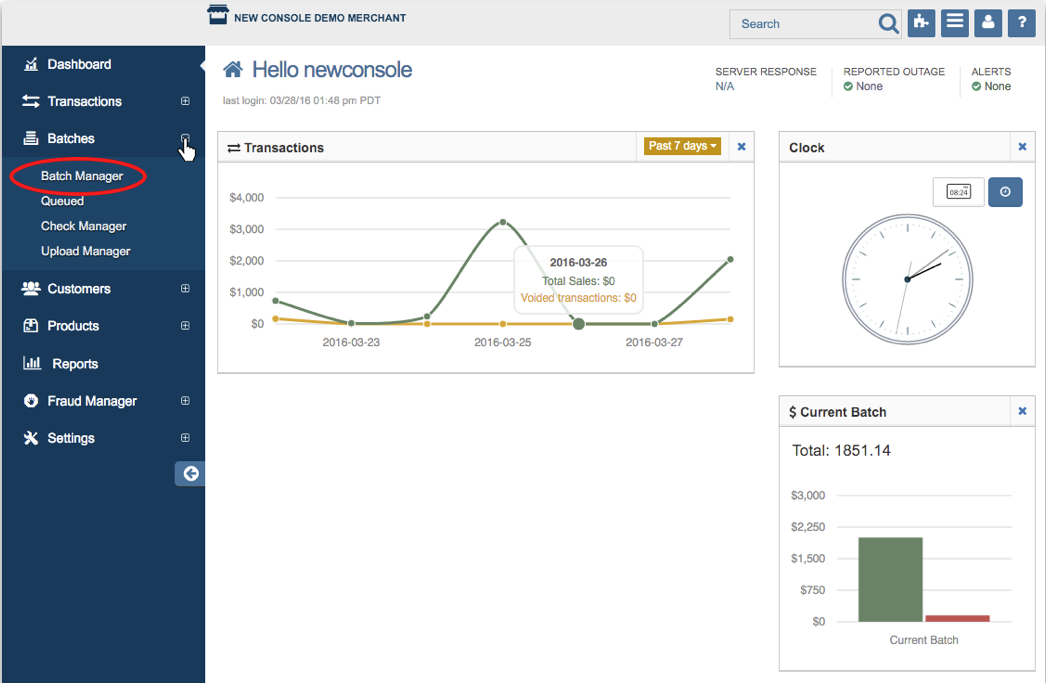
To access the Batch Manager, click on ‘Batches’ on the side menu bar then select ‘Batch Manager’ from the drop down menu.
Your current open batch is displayed when you first enter the Batch Manager page. The open batch contains all transactions that have not yet closed or settled.
Batch Summary
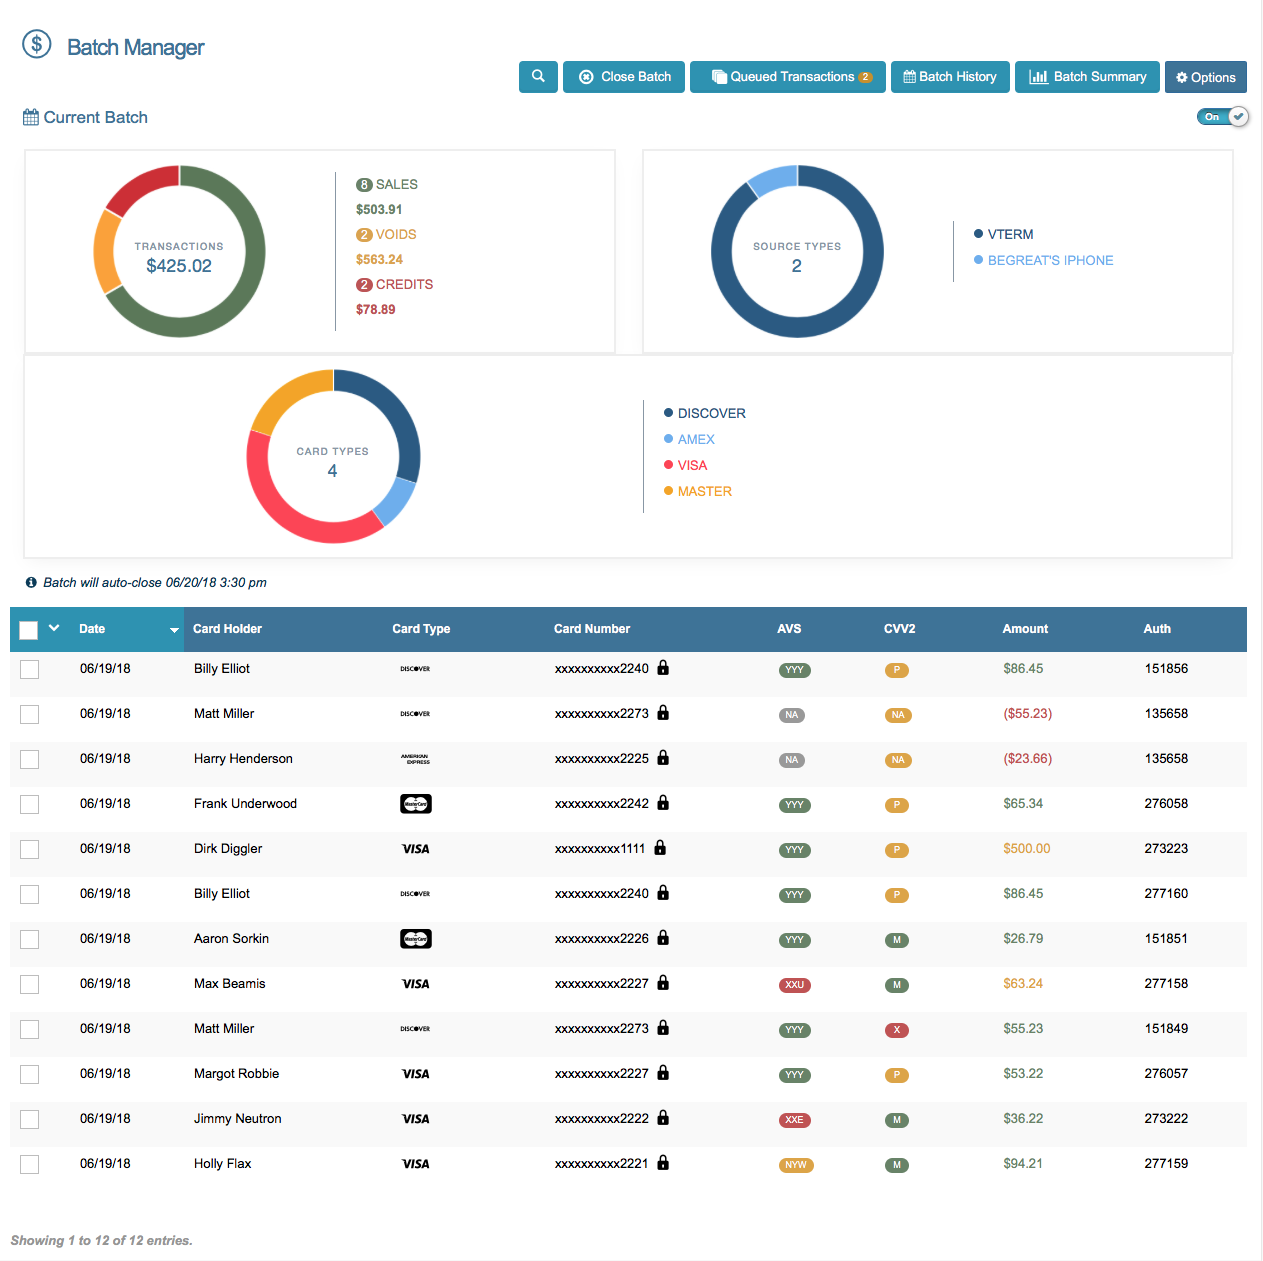
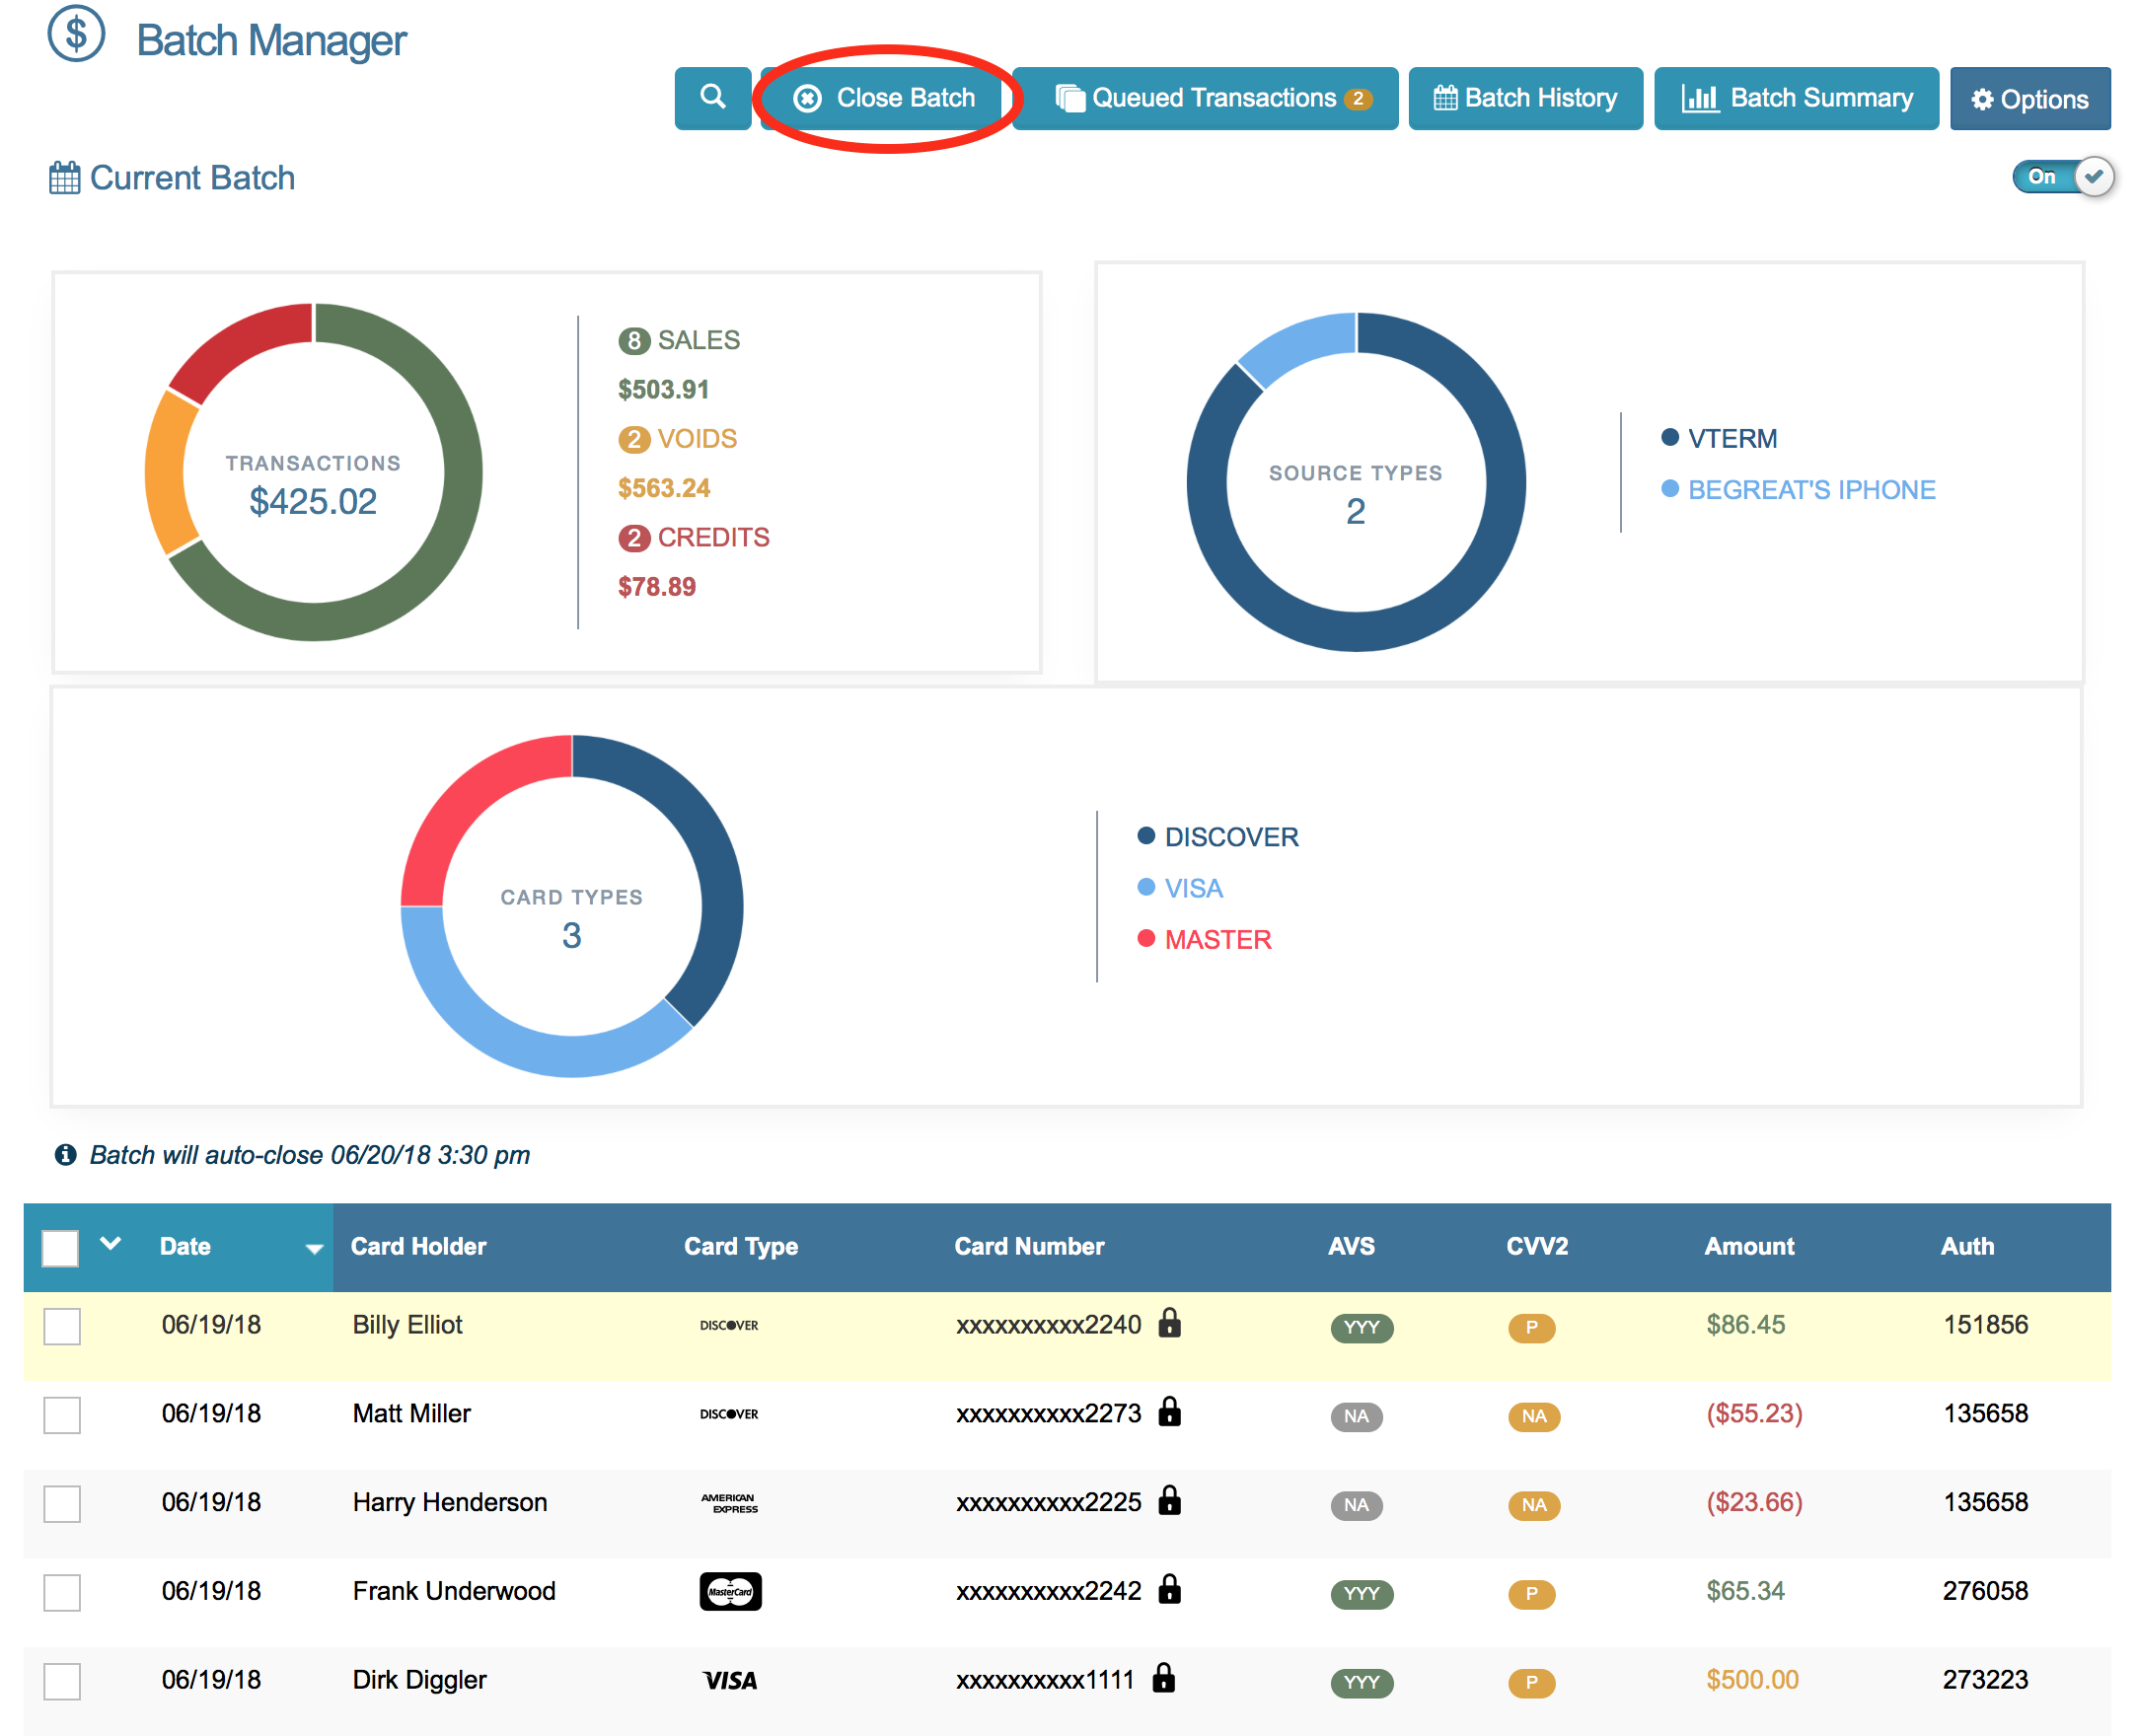
The top section of the Batch Manager shows a detailed and graphical breakdown of your current batch. The specific breakdowns are:
- Summary of Batch Total based on your Total Sales, Total Voided, and Total Credits (or refunds).
- Breakdown of your Transactions By Source.
- Breakdown of your Transactions by Card Type.
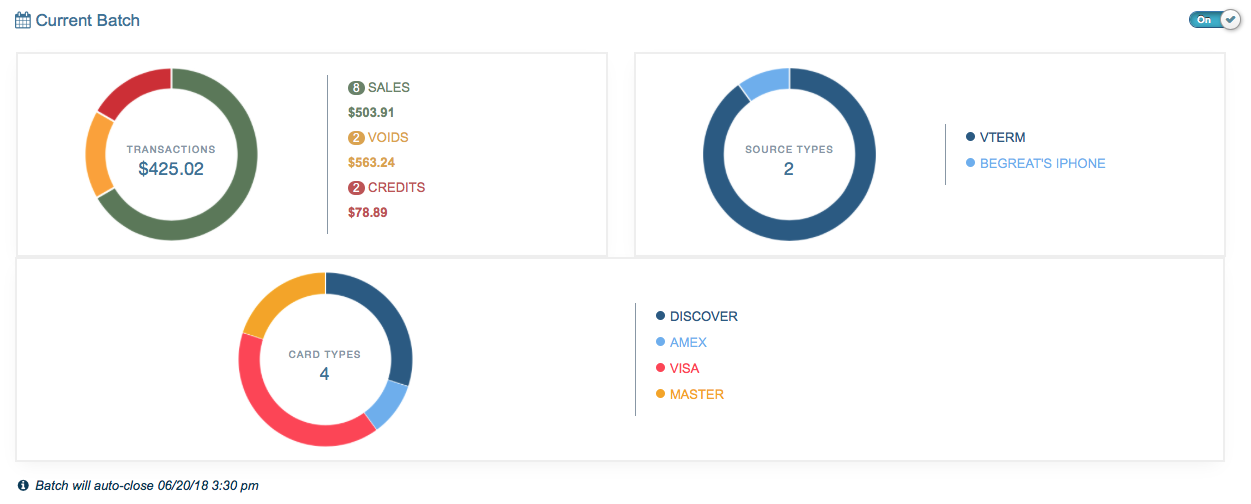
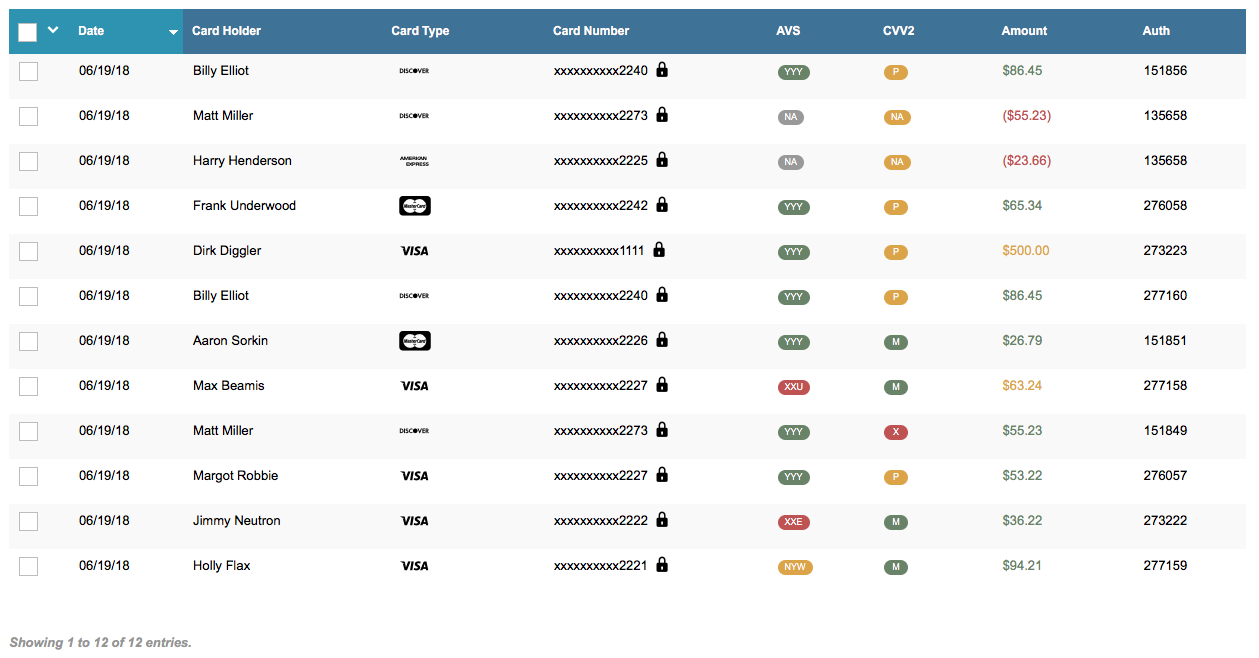
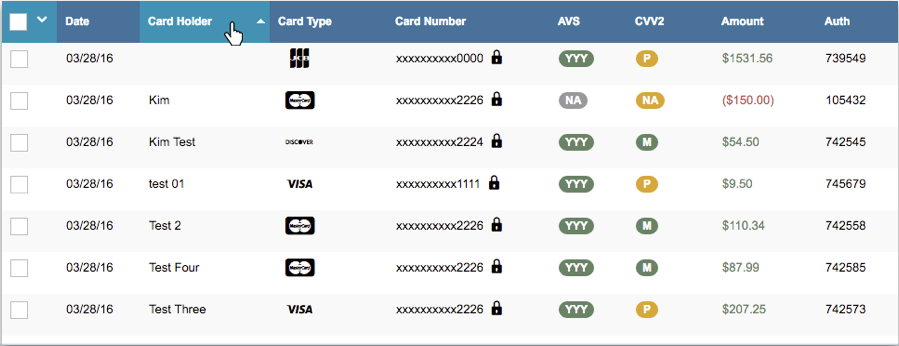
The bottom section of the Batch Manager shows the transaction details for the current batch such as the Date, Cardholder’s Name, Card Type, Card Number, Address Verification System or AVS, Card Verification Value or CVV2, the Amount of the transaction, and the Authorization Code.
Remove Summary
If you prefer not to have this section on your Batch Manager Page, click on the ON/OFF switch on the top right side of the graph section.

When the graphs are turned off, you will only see the transaction list. Once changed, this will be the default for whenever you login to the merchant console. This setting is set at the user level, so each user can set their own default.

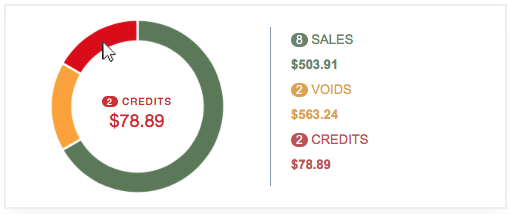
Summary By Transaction Type
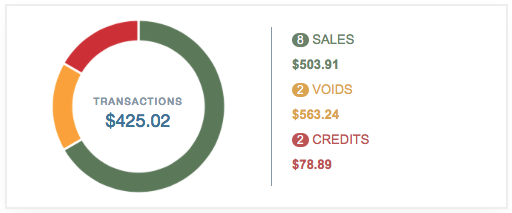
The transaction summary shows the transaction totals by amount, transaction count, and type (sales, voids, and refunds) in the batch.
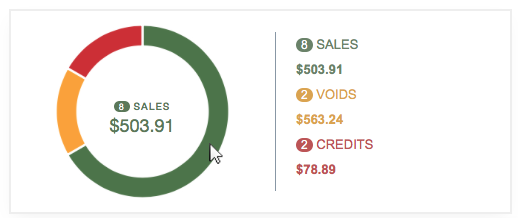
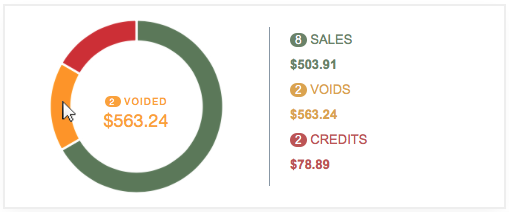
Hover over each section to see the transaction amount total for sales, voids, and refunds.
Summary By Source
The Source Key is a 16 alphanumeric digit that allows merchants to integrate with shopping carts, 3rd party softwares, and the ability to build a payment form. It identifies the source of where and how the transaction was processed.
The source summary shows a list of sources in the batch, and the number of sources in the center of the circle.
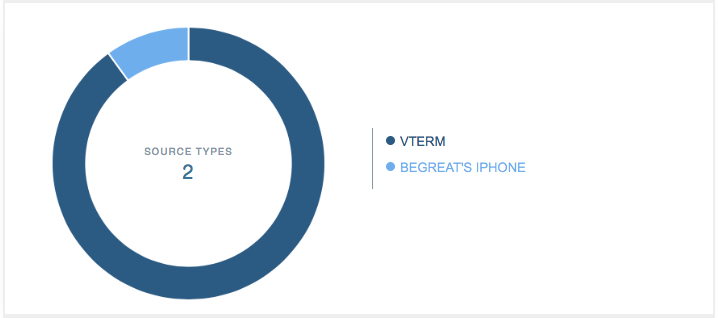
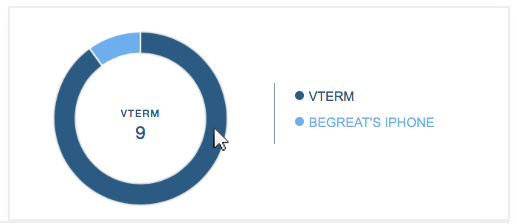
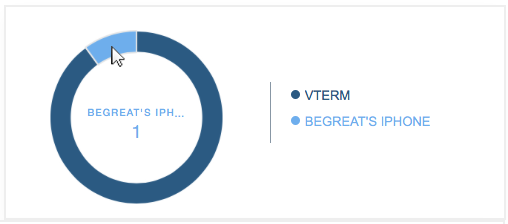
Hover over each section to see transaction count by source.
Summary By Card Type
The card type summary shows a list of card types in the batch, and the number of transactions in the center of the circle.
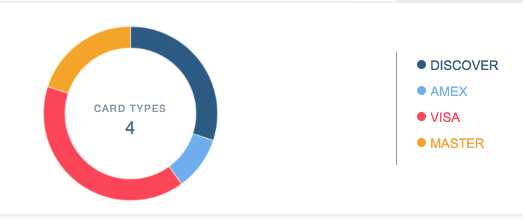
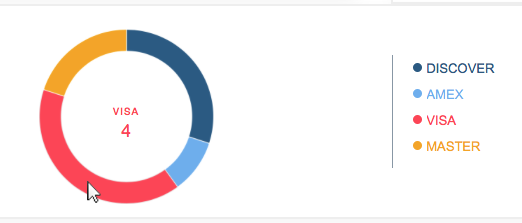
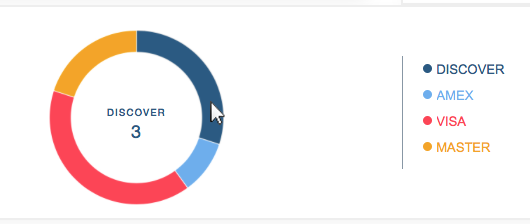
Hover over each section to see the transaction count total for each individual card type.
Close Batch
The current (open) batch MUST be closed to receive processed funds. To close your current (open) batch, click 'Close Batch' located on the top right hand side of your Batch Manager page.
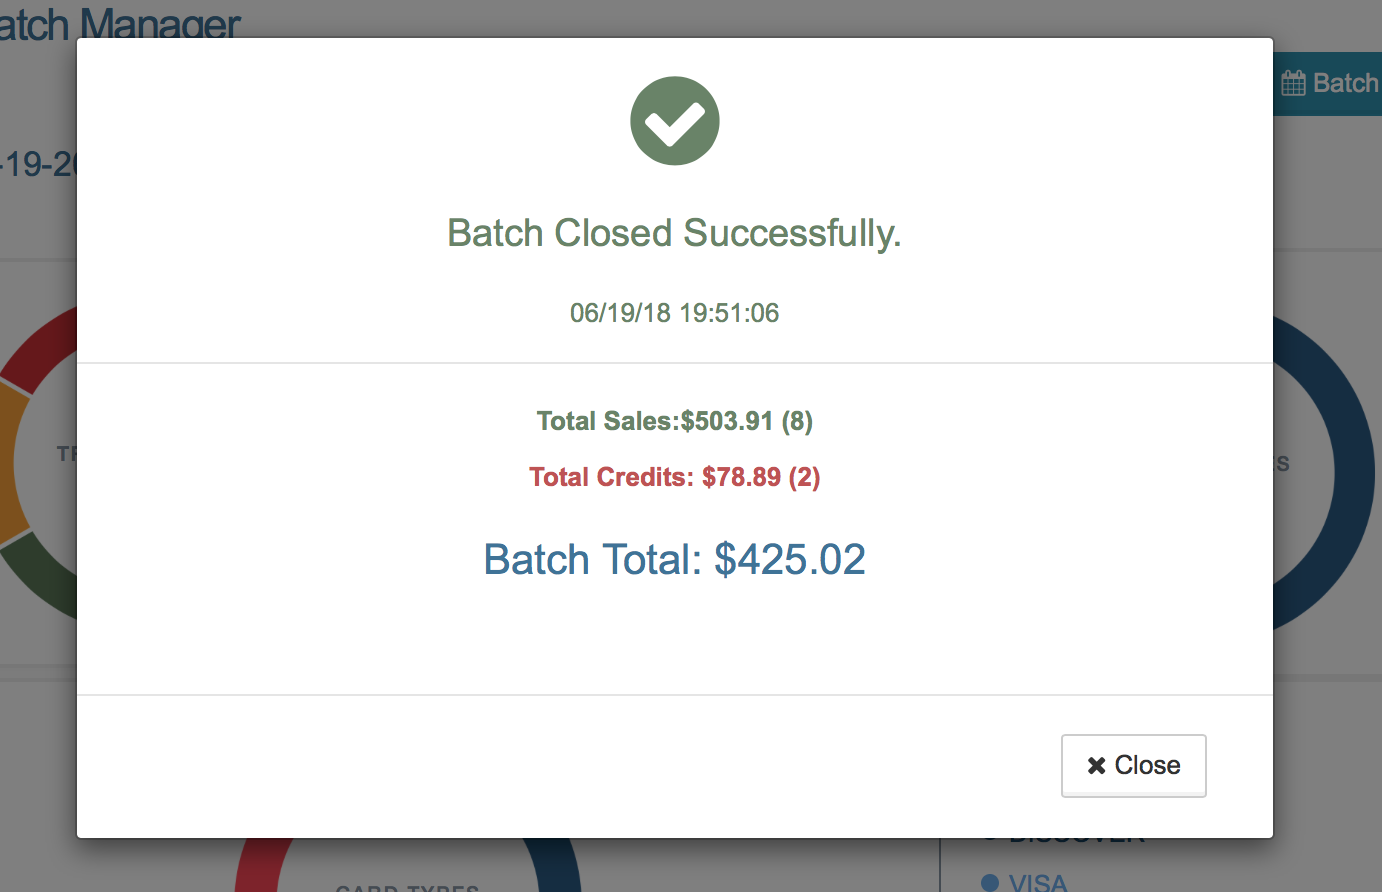
Once you close the batch, a pop up window will appear to confirm if your batch was successfully closed or if it failed to close due to an error. Please Note: You may choose to set your account to automatically close open batches on a daily basis. This can be done in Settings.
Bulk Options
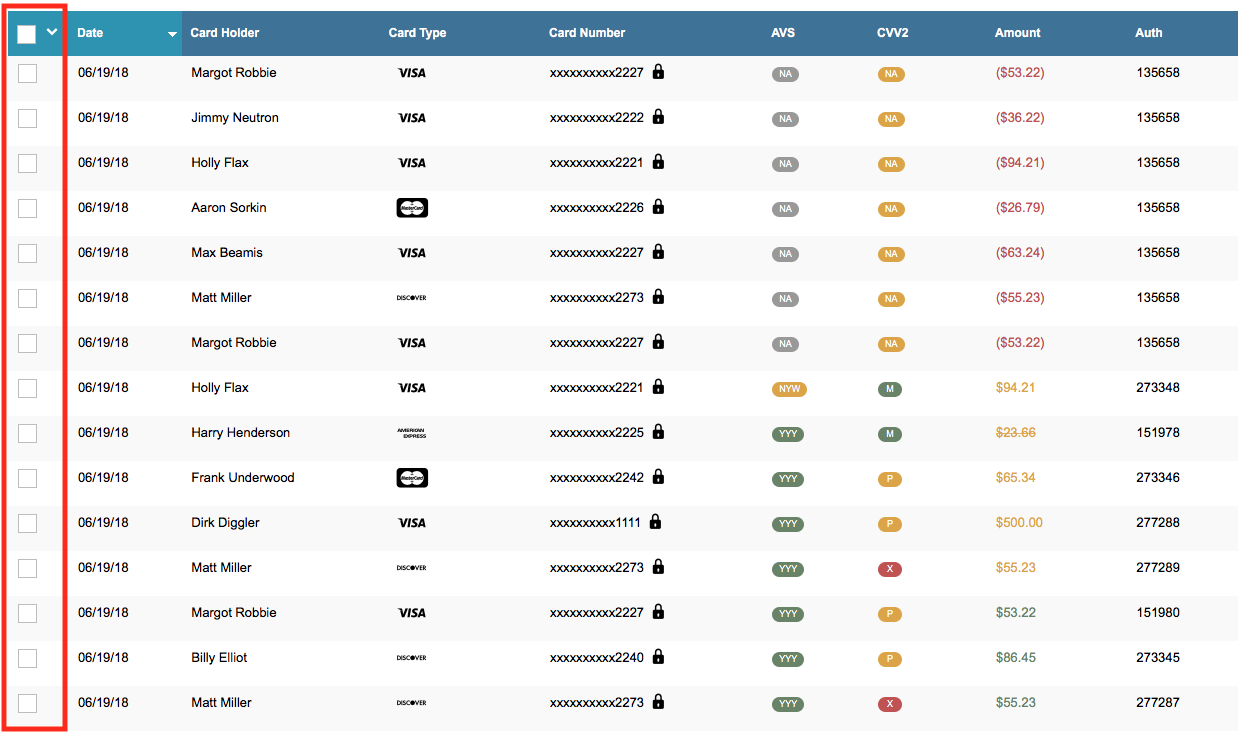
The batch manager allows you to perform bulk actions on transactions. Check the boxes for each transaction you would like to perform a bulk action on.
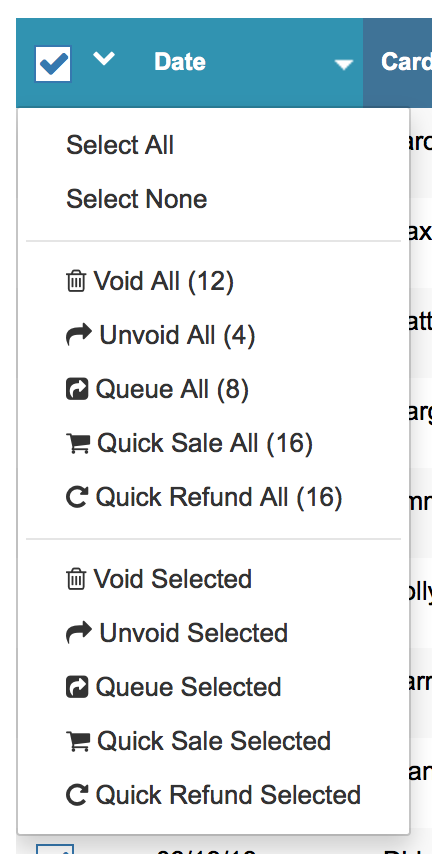
Click on the carrot on the upper right to see the available bulk actions.

Possible Options are:
- Select All
- Select None
- Void All/Void Selected
- Unvoid All/Unvoid Selected
- Queue All/Queue Selected
- Quick Sale All/Quick Sale Selected
- Quick Refund All/Quick Refund Selected
Bulk Void
Since settled transactions cannot be voided, this option will only be available for currently open batches. When you select the bulk void option, you will see the following prompt. If the transaction is not available to void, it will automatically be unselected.
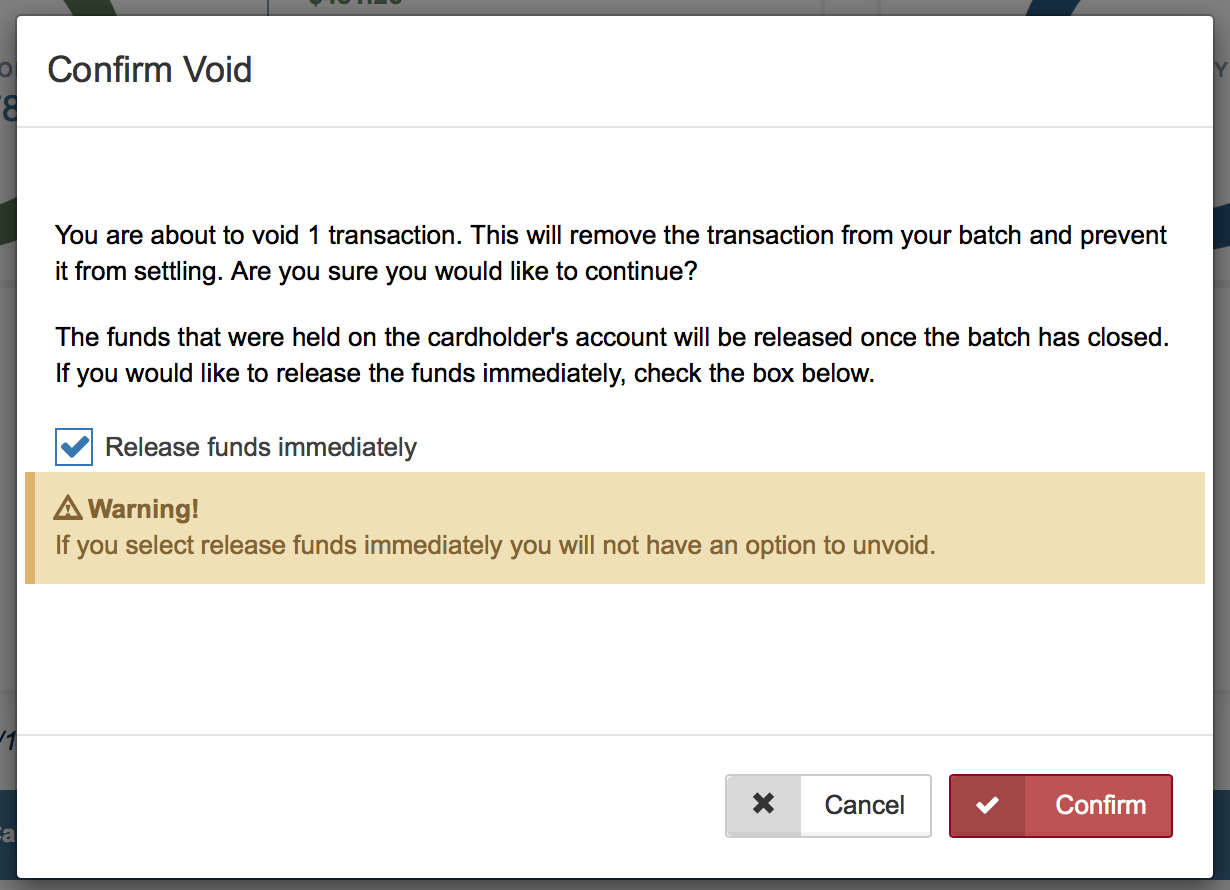
Check the "Release Funds Immediately" box if you would like to have the funds immediately returned to the card holders account. Please Note: If you release the funds, the transactions can NOT be unvoided.
Bulk Unvoid
Since you cannot unvoid settled transactions this option will only be available for currently open batches. It will also not be available transactions transactions have been voided and funds released. When you select the bulk unvoid option, you will see the following prompt. If the transaction is not available to unvoid, it will automatically be unselected.
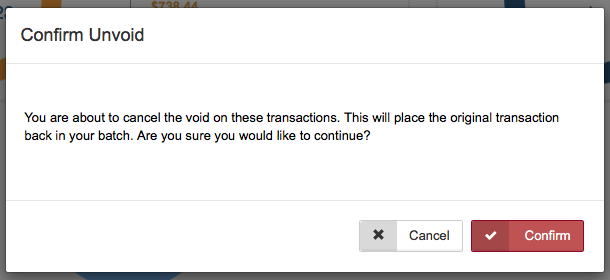
Click "Confirm" to process.
Bulk Queue
Since you cannot queue settled transactions, this option will only be available for currently open batches. You also will not be able to queue voided transactions or refunds. If the transaction is not available to queue, it will automatically be unselected. When you select the bulk queue option, you will see the following prompt.
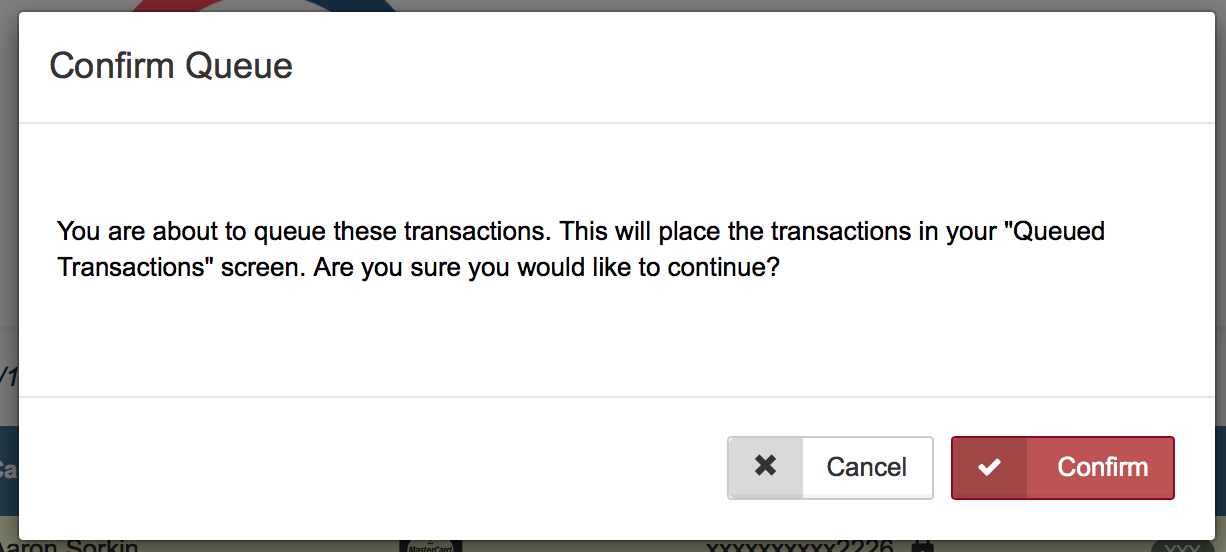
Click "Confirm" to process.
Bulk Sale
When you select the quick sale option, you will see the following prompt.
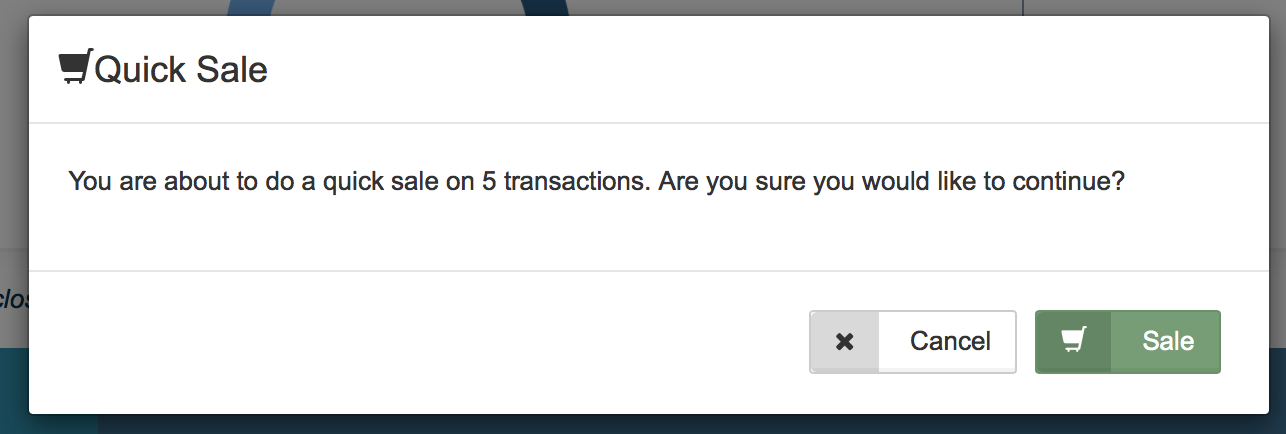
Click "Sale" to confirm running the quick sale. After the transactions are run, you will see a report of which transactions were successful and which were declined.
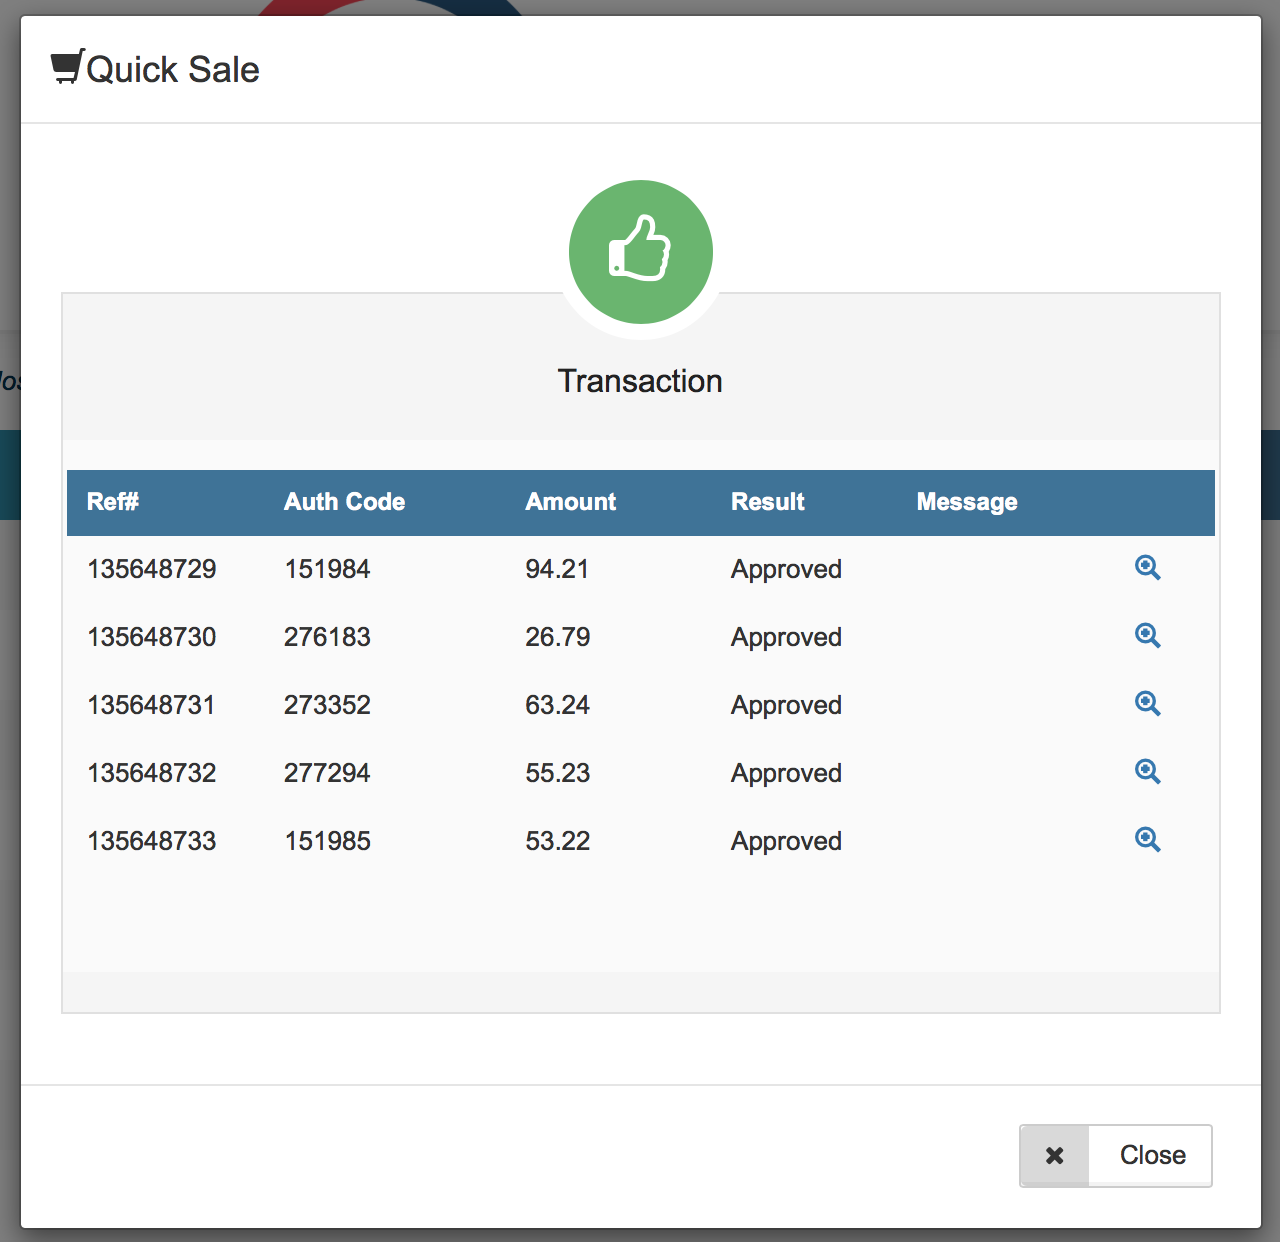
Click the magnifying glass to see the details for each transaction.
Bulk Refund
When you select the quick refund option, you will see the following prompt.
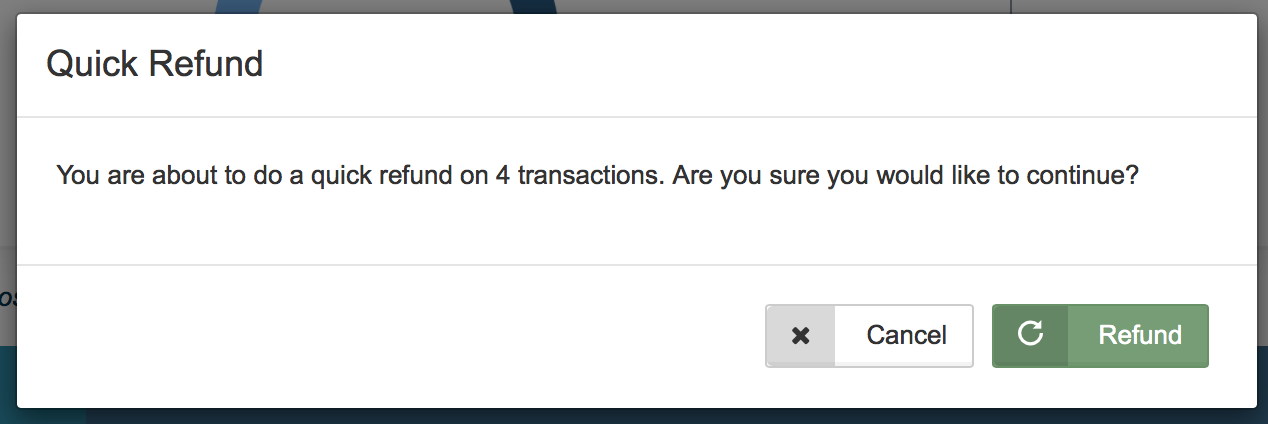
Click "Refund" to confirm running the quick sale. After the transactions are run, you will see a report of which transactions were successful and which were declined.
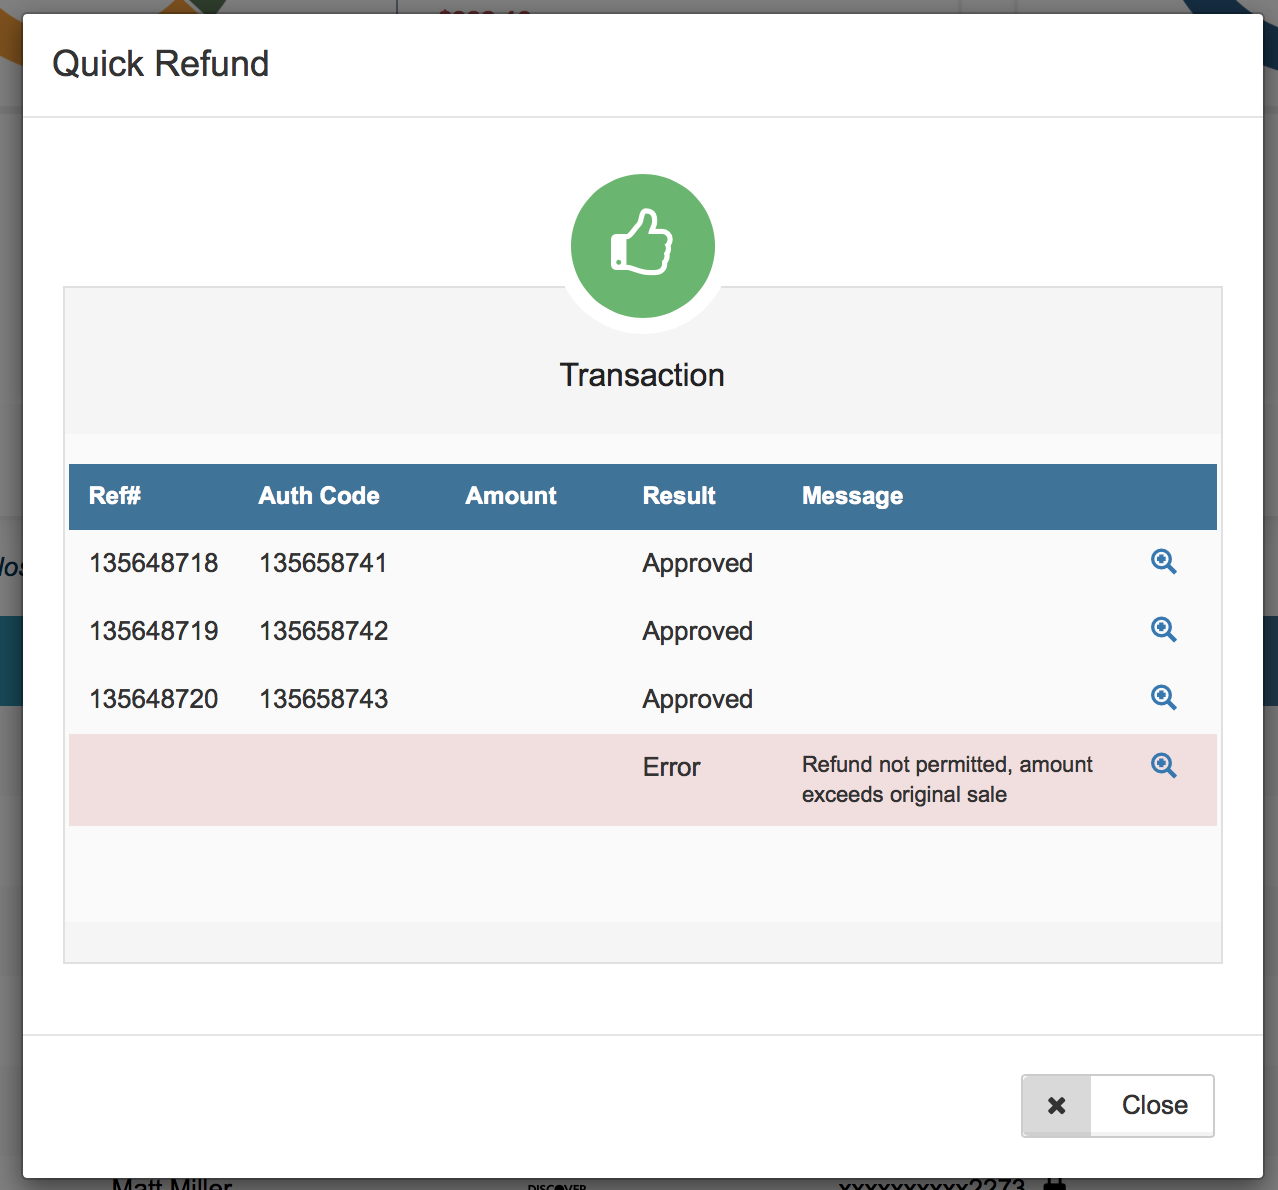
Click the magnifying glass to see the details for each transaction.
Batch Options
Rearrange Table
By default, your batch is arranged with the most recent transaction at the top and the oldest (or first) transaction of the batch at the bottom. The table can be rearranged based on the Card Holder’s first name, Card Type, Card Number, Amount, or the Authorization Code. For example, click ‘Card Holder’ on the top bar of the table to rearrange the table by the Card Holder's name.
Customize Table
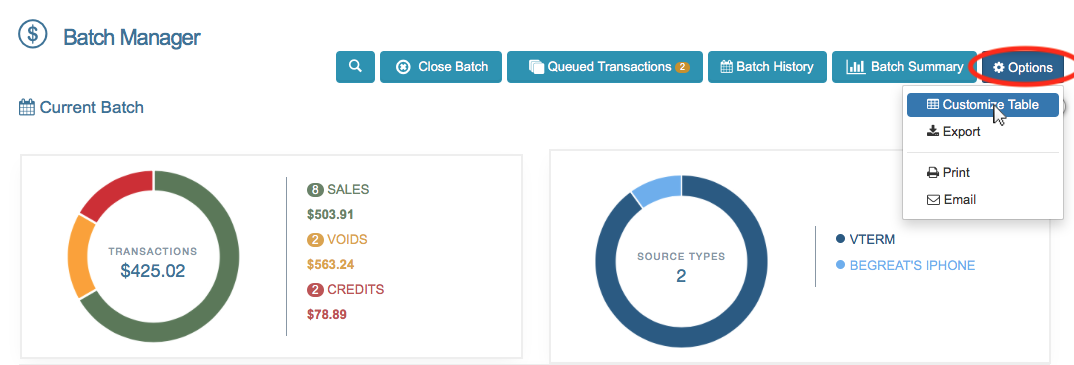
You can customize your table by adding or removing specific fields. Click 'Options' on the top right hand side of your Batch Manager page then click ‘Customize Table’.
The ‘Table Options’ pop up window will appear showing your current fields and available fields. To add more columns into your current batch table, drag and drop a field button into the ‘Current Fields’ section. To remove a specific column, drag and drop the desired field button from the 'Current Fields’ section to the 'Available Fields’ section.
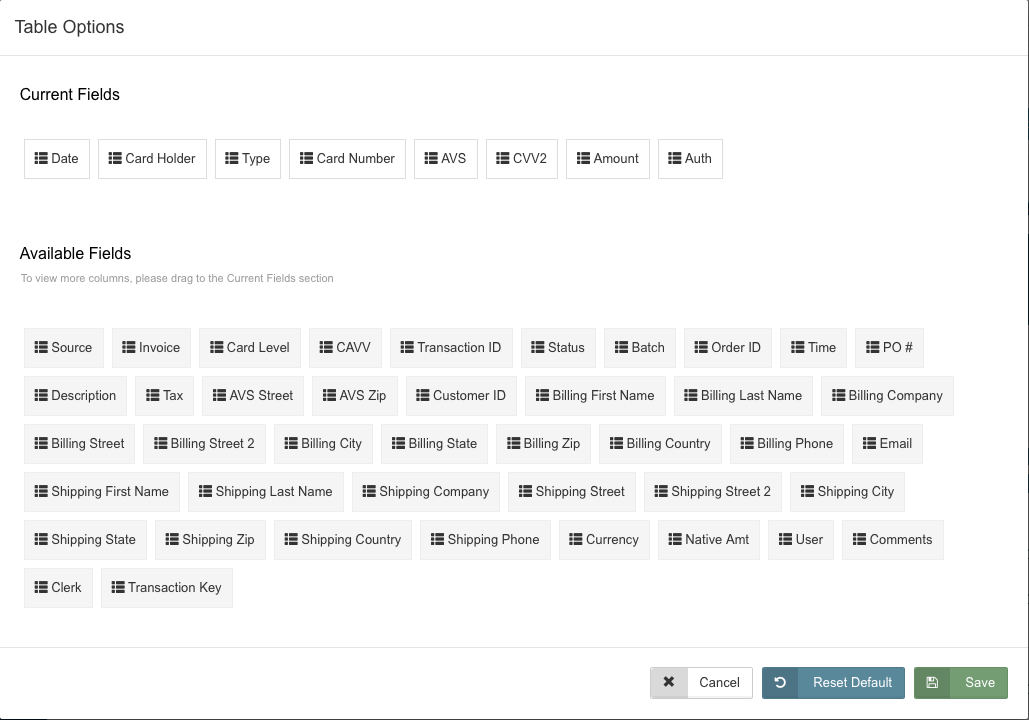
Once you have finished adding or removing specific fields, click 'OK.' If you want to reset your table to default, click 'Reset Default.'
Export Batch
The Batch Manager allows you to export your current batch or previous batches. To export your current batch, click 'Options' then select ‘Export’ from the drop down menu.
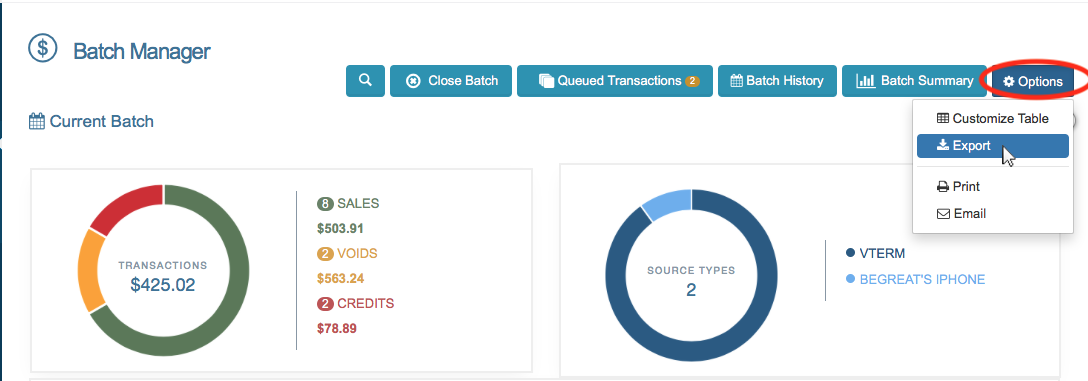
Select the desired file type (CSV, Tab Delimited or a JSON file) in the pop-up window, then click 'Export'.
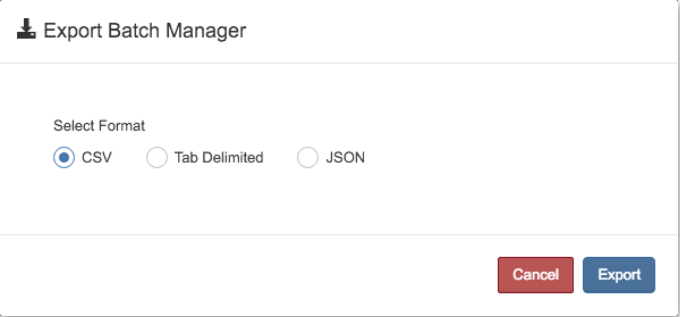
The file should automatically download in your browser.
Print Batch
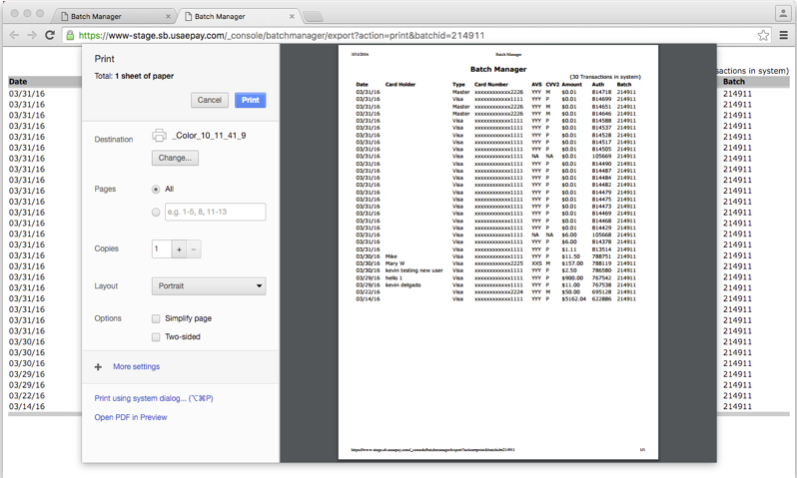
The Batch Manager allows you to print your current batch or previous batches. To print your current batch, click 'Options' then select ‘Print’ from the drop down menu.
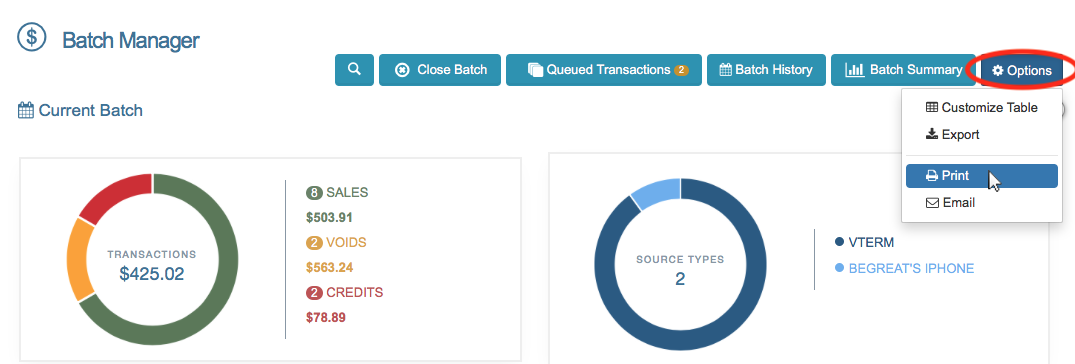
A PDF print window will pop up on your web browser, click ‘Print’ to print your PDF copy.
Email Batch
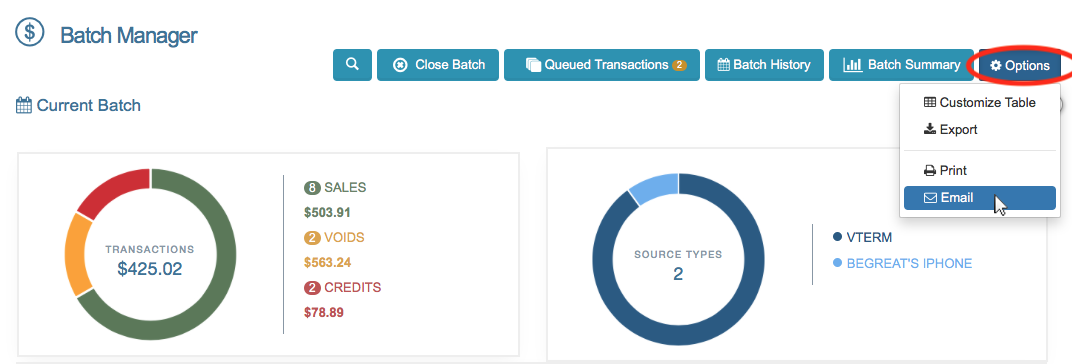
The Batch Manager allows you to email your current batch or previous batches. To email your current batch, click 'Options' then select ‘Email’ from the drop down menu.
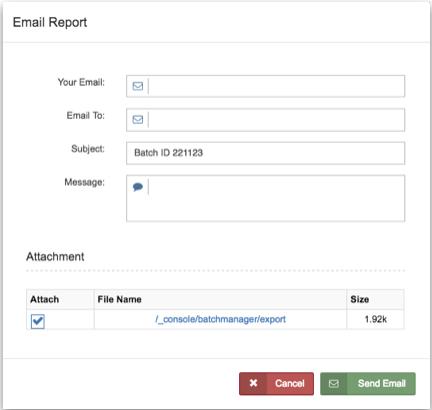
The ‘Email Report’ pop up will appear. Fill in the fields: ‘Your Email’, ‘Email To’, ‘Subject’, and ‘Message’.
Check the Attach box, to attach the PDF report file in the email, then click 'Send Email'.
Please Note: The exported, printed, and emailed files will only contain information displayed on the Batch Manager page. To add more fields into your files, see the Customize Table section of this page.
Transaction Details
To view a transaction’s details in your current batch, click on the desired transaction.
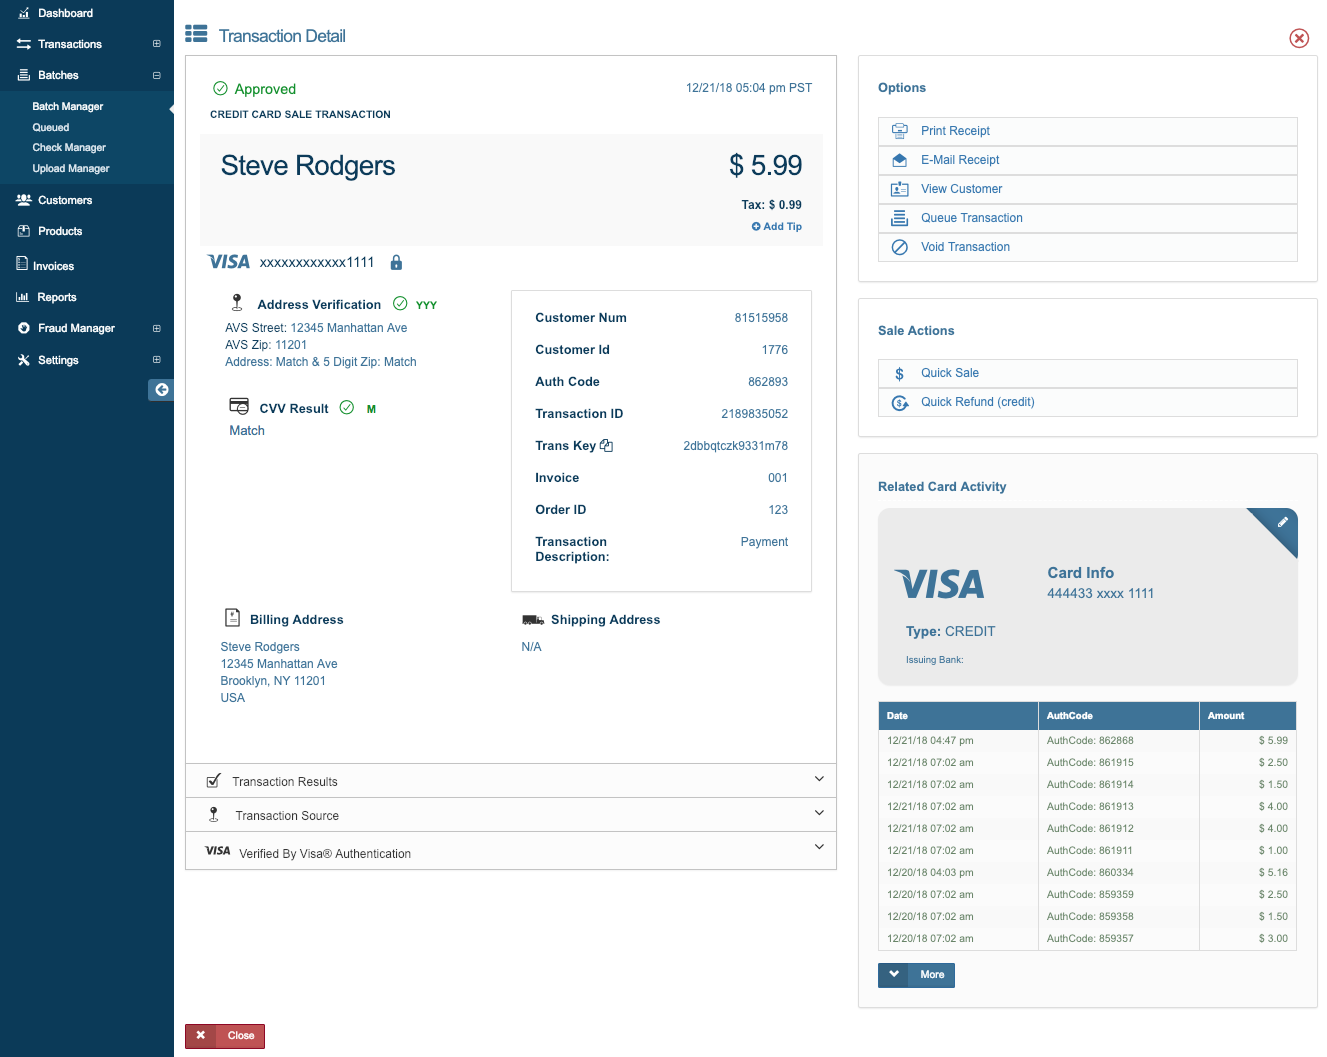
Once you click the transaction, you will be taken to a new page with that transaction’s complete details. Please Note: You will only be able to view approved debit or credit card transactions in the Batch Manager.
From this page, you can view the following information (see below):
- Main Transaction Details
- Cardholder Name
- Transaction Date
- Transaction Time
- Transaction Amount
- Tip Amount (if applicable)
- Customer Number
- Customer ID
- Transaction ID
- Description
- Invoice Number
- The card information
- AVS(Address Verification) Result
- CVV Result
- Billing Address
- Shipping address
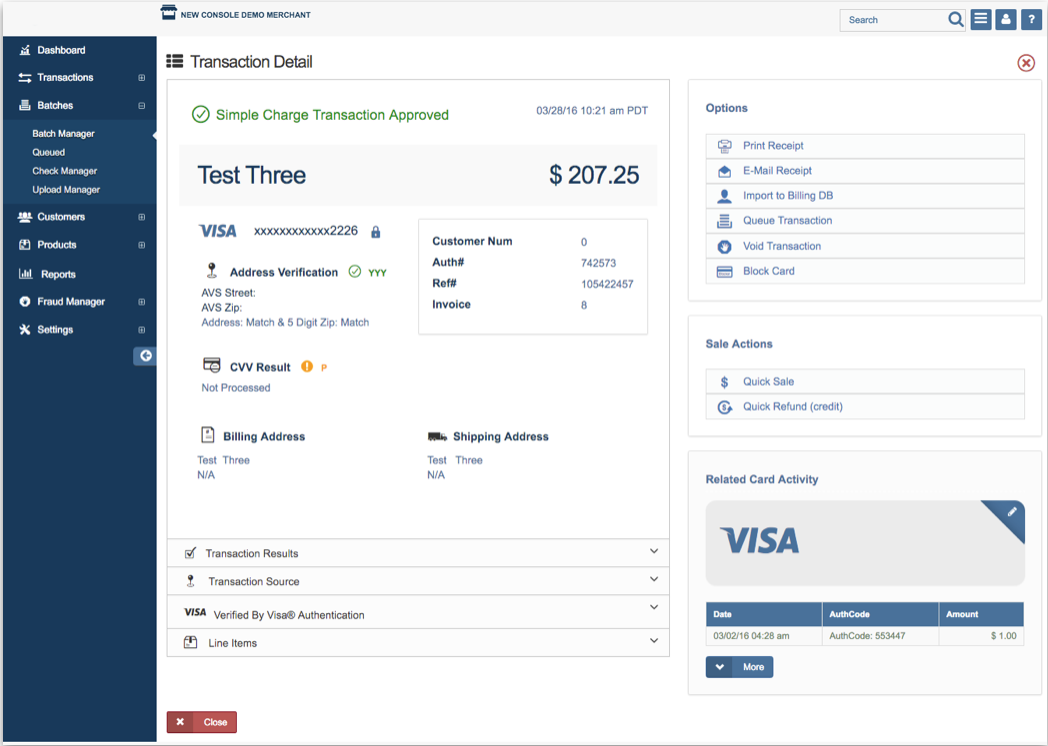
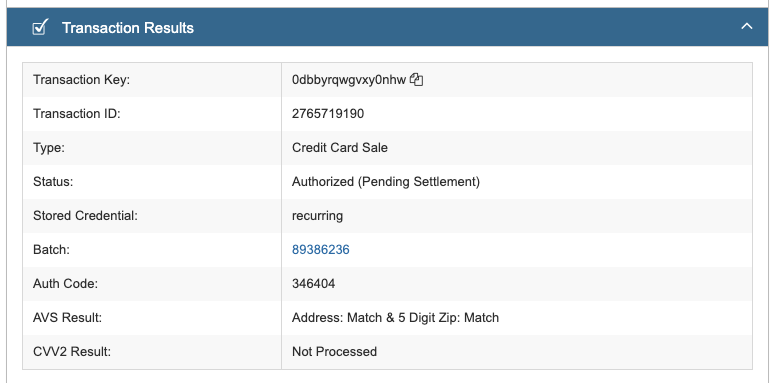
There are also the following drop down menus which will reveal more transaction details if you click on them:
- Transaction Results
- Transaction Key
- Transaction ID
- Type of Transaction
- Status of the Transaction
- Stored Credential
- Batch Number
- Authorization or Auth Code
- AVS Result
- CVV2 Result
- Card Level Result
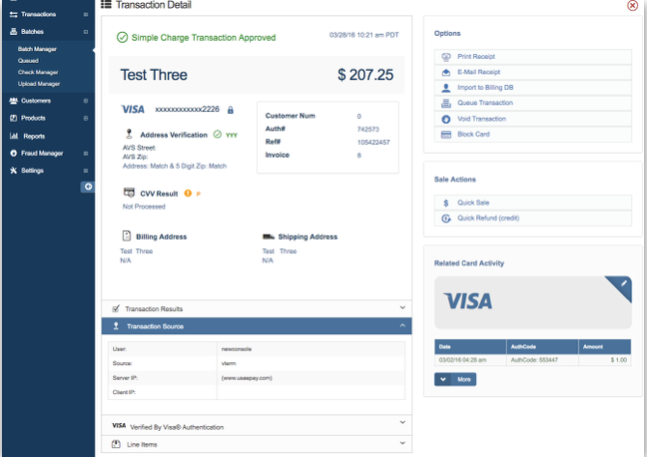
- Transaction Source
- User
- Source
- Server IP
- Client IP
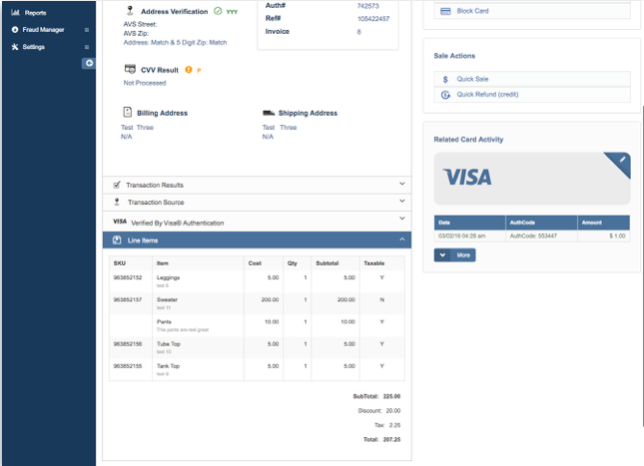
- The Line Items
- SKU
- Line Items
- Count
- Quantity
- Subtotal
- Taxable
From this page, you also have a few options for action:
- Print Receipt
- Email Receipt
- Import to Billing DB (Database) - This adds the customer’s billing information to your recurring billing database.
- Queue Transaction - This moves the transaction to your Queued Transactions allowing you to change the amount of the transaction. A transaction can only be moved to your Queued Transactions BEFORE the transaction has settled.
- Void Transaction - A transaction can only be voided BEFORE it has settled.
- Block Card - This blocks the customer’s debit or credit card.
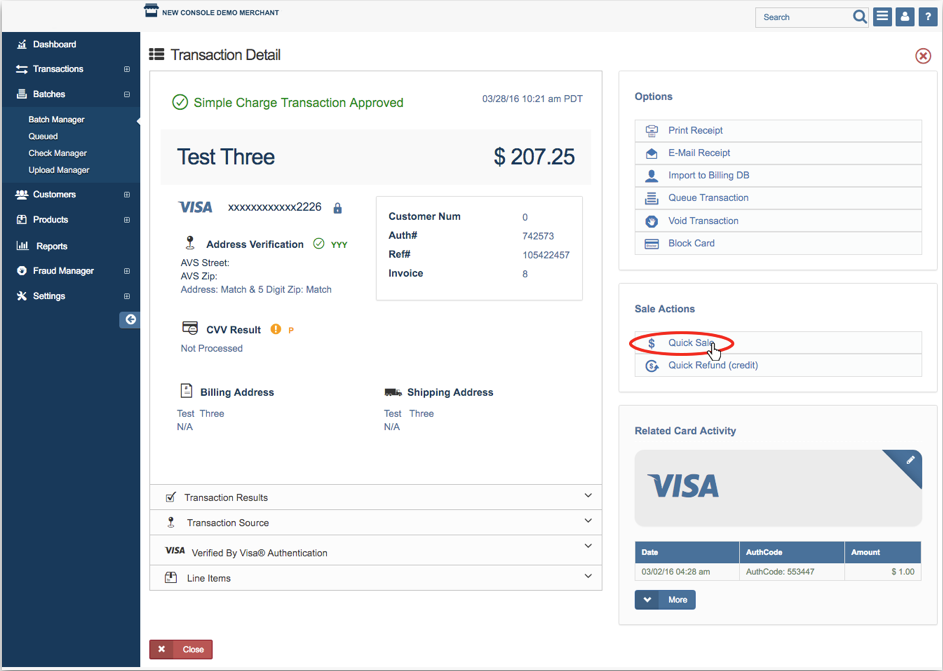
- Quick Sale - This is a link to perform a sale transaction with the same credit card information.
- Quick Refund (credit) - This is a link to return funds to the customer with the same credit card information.
- View Related Card Activity - This shows all the processed transactions associated with the card, including errors, voids, and declines.
Stored Credential
The Stored Credential field indicates what type of transaction you processed with a stored customer payment method. This a new card brand requirement, that requires merchants to tell them when they are storing a customer payment method, and also pass through some information each time they use the the method. These types will show on the transaction details when selected in the customer database vterm and the New Order screen under Transactions.
- Recurring - this indicates a recurring transaction. This is shown when manually running payments and when the billing schedule runs automatically.
- Unscheduled - Customer Initiated - this is a transaction that the customer has prompted the merchant to process on their behalf for services, goods, etc.
- Unscheduled - this is a merchant initiated transaction that is not part of a normal recurring run.
Search For A Transaction
To search for a specific transaction, click the search icon located at the top right hand side of the Batch Manager page. A transaction can be searched by typing in the last four digits of the Card Number, Cardholder’s Name, Transaction Amount, Authorization Code, or Transaction ID.
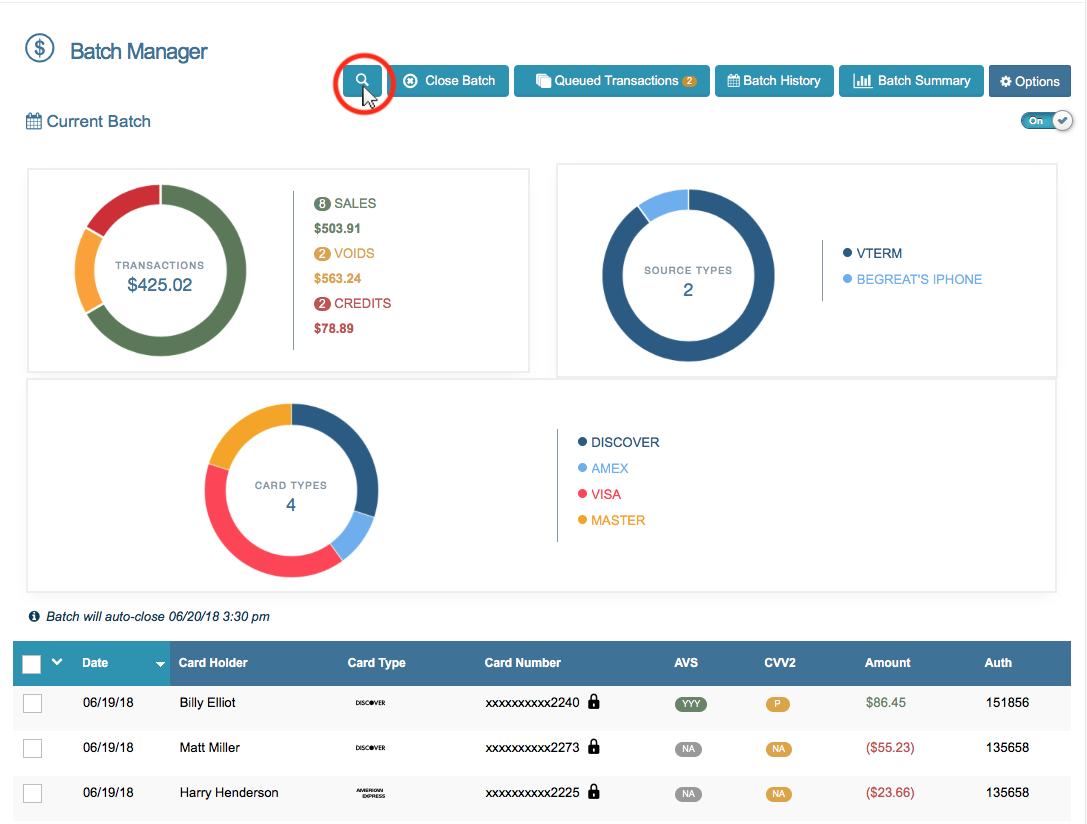
The image below shows an example of searching for a transaction by the card holder’s name. Enter the name of the card holder in the search field. All transactions that match the criteria entered will appear on the page.

Void Transaction
Voids can be processed from the Transaction Detail page or from the Batch Manager home page.
Please Note: A transaction can only be voided if the transaction is still in your current open batch. If a transaction is closed or settled, you can only issue a refund.
Void From Transaction Details
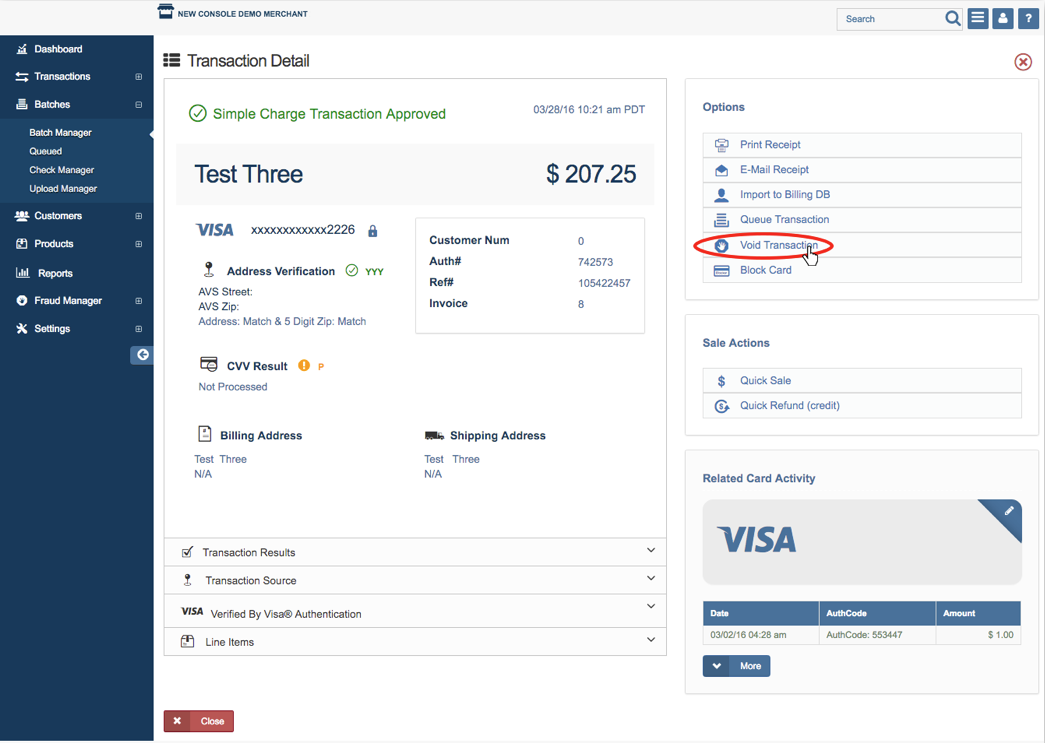
Click on ‘Void Transaction’ in the Options section, on the right hand side of the Transaction Detail page.
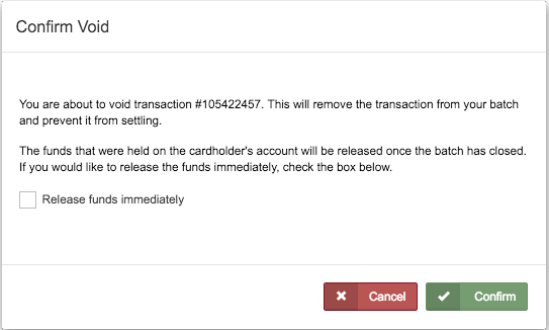
A pop up window will appear to confirm the void. To release the funds back to the customer’s bank account immediately, check the ‘Release funds immediately’ box then click 'Confirm.'
Void Transaction From Batch Manager
Right click on the transaction, then click ‘Void’.

A pop up window will appear to confirm the void. To release the funds back to the customer’s bank account immediately, check the ‘Release funds immediately’ box then click 'Confirm.'

Quick Refund
Much like issuing a void, you can issue a Quick Refund from a Transaction Detail page or from the Batch Manager home page. Please Note: A refund can only be issued when a transaction from a batch is settled.
From Transaction Details
Click on ‘Quick Refund (credit)’ in the Sale Actions section, on the right hand side of the Transaction Detail page.
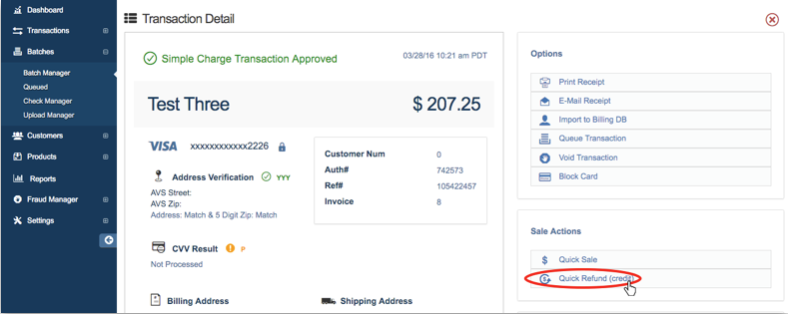
A pop up window will appear. Fill out the desired fields (Amount, Tax, Invoice, Order ID, PO#, Customer ID, or Description) to process the refund.
The ‘Amount’ field is the only field required, all the other fields are optional. Once all desired fields have been entered, click 'Refund'. Please Note: There is no prompt to confirm the refund transaction. Be sure to double check information is correct before processing.
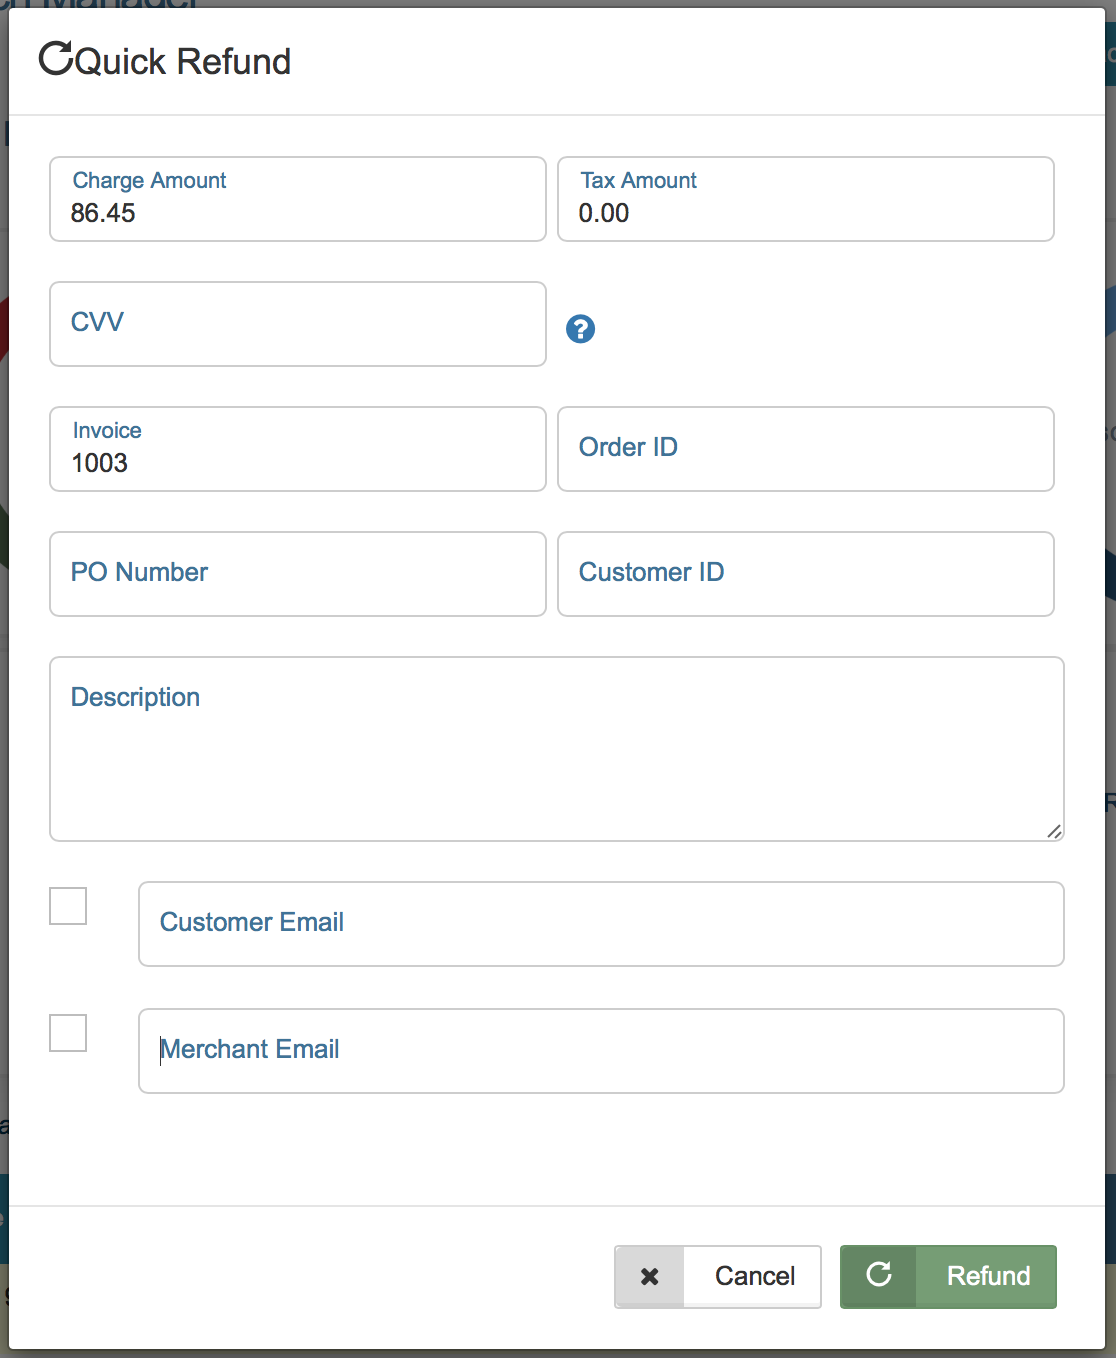
A confirmation message will appear with one of three responses: ‘Transaction Approved’, ‘Transaction Declined’, or ‘Error’.
From Batch Manager
Right click on the transaction, then click ‘Quick Refund’.

A pop up window will appear. Fill out the desired fields (Amount, Tax, Invoice, Order ID, PO#, Customer ID, or Description) to process the refund.
The ‘Amount’ field is the only field required, all the other fields are optional. Once all desired fields have been entered, click 'Refund'. Please Note: There is no prompt to confirm the refund transaction. Be sure to double check information is correct before processing.

A confirmation message will appear with one of three responses: ‘Transaction Approved’, ‘Transaction Declined’, or ‘Error’.
Quick Sale
The Batch Manager allows you to process a quick sale through a transaction’s detail page or the Batch Manager homepage.
From Transaction Details
Click on ‘Quick Sale’ on the Sale Actions section on the right side of the Transaction Detail page.
A pop up window will appear. Fill out the desired fields (Amount, Tax, Invoice, Order ID, PO#, Customer ID, or Description) to process the Quick Sale.
The ‘Amount’ field is the only field required, all the other fields are optional. Once all desired fields have been entered, click 'Sale'. Please Note: There is no prompt to confirm the refund transaction. Be sure to double check information is correct before processing.
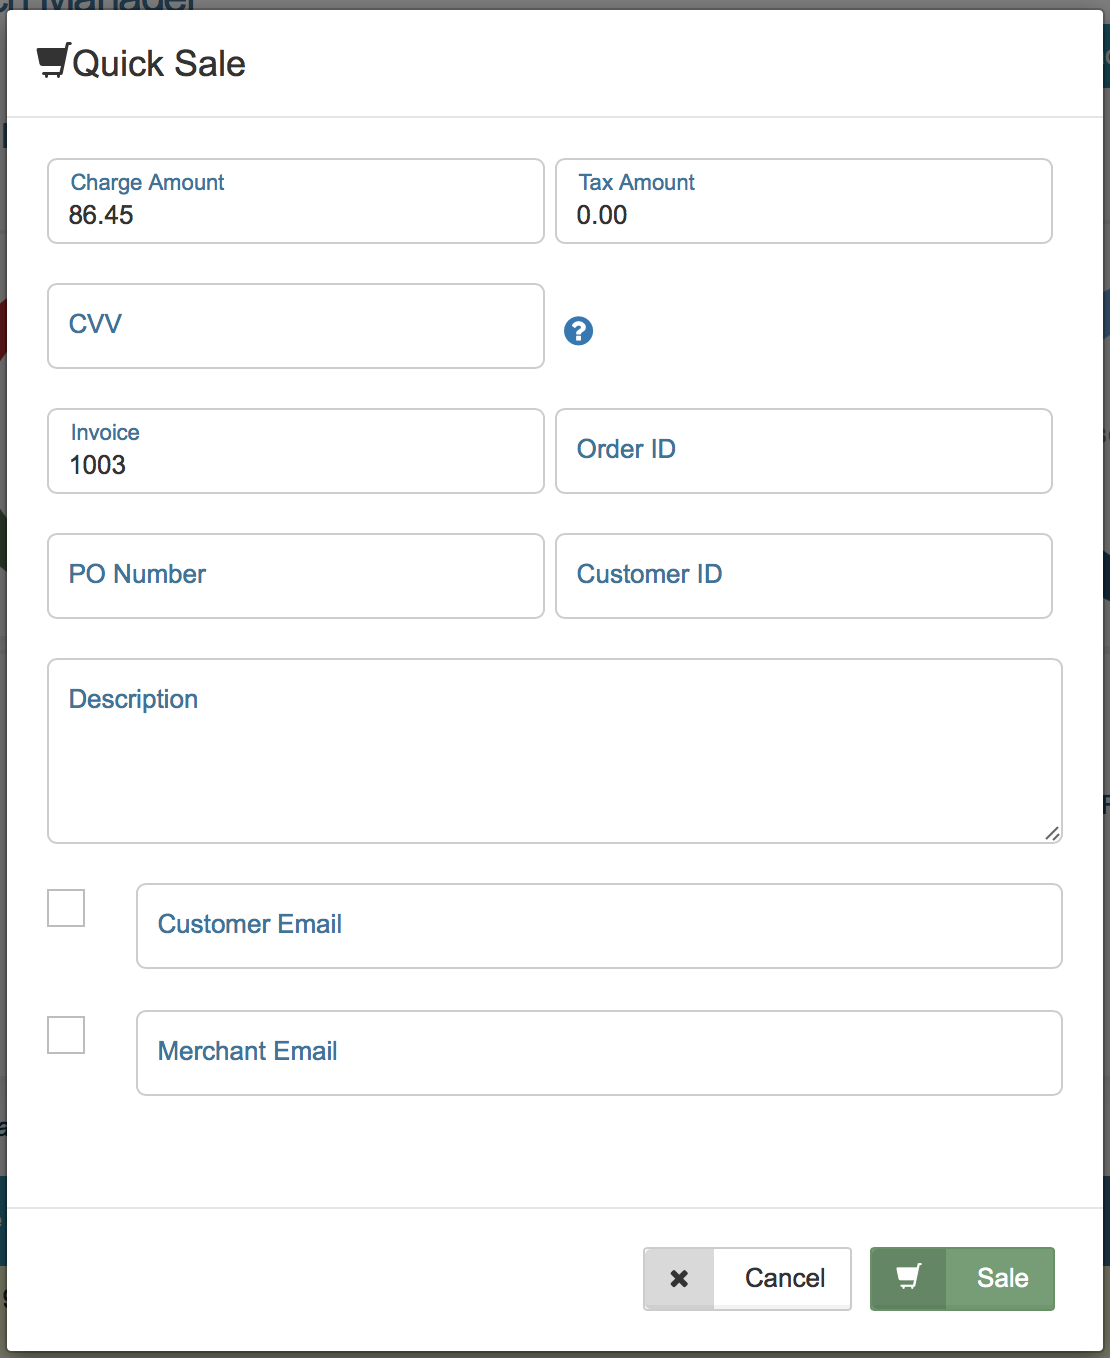
A confirmation message will appear with one of three responses: ‘Transaction Approved’, ‘Transaction Declined’, or ‘Error’.
From Batch Manager
Right click on the transaction, then click ‘Quick Sale’.
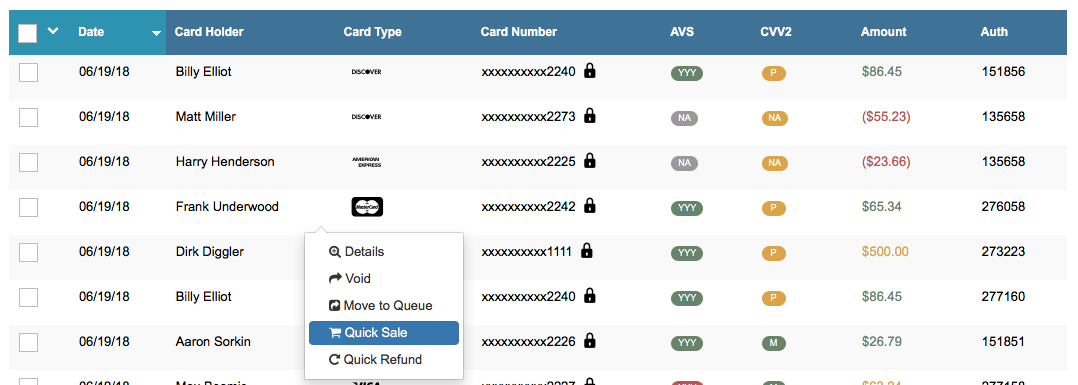
A pop up window will appear. Fill out the desired fields (Amount, Tax, Invoice, Order ID, PO#, Customer ID, or Description) to process the Quick Sale.
The ‘Amount’ field is the only field required, all the other fields are optional. Once all desired fields have been entered, click 'Sale'. Please Note: There is no prompt to confirm the refund transaction. Be sure to double check information is correct before processing.

A confirmation message will appear with one of three responses: ‘Transaction Approved’, ‘Transaction Declined’, or ‘Error’.
Batch History
All closed batches can be viewed in your Batch History. To view your previous closed batches, follow these steps:
Click 'Batch History' located at the top hand right side of your Batch Manager homepage. See image below:
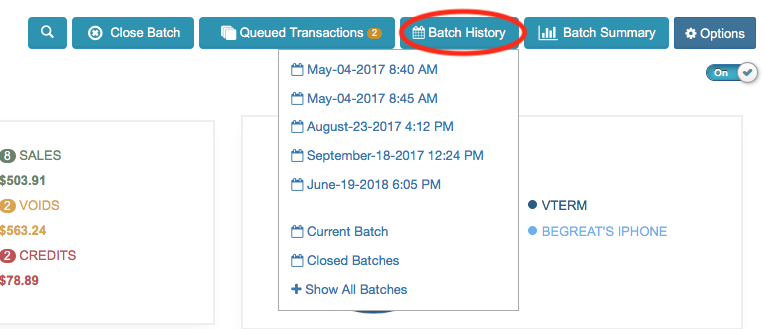
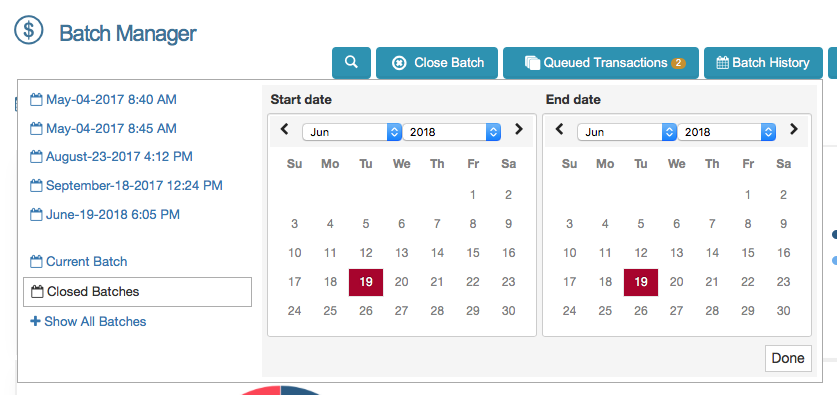
To view a closed batch for specific dates, click ‘Closed Batches’ from the drop down then select the date(s) on the calendar. Once you have selected the dates, click 'Done'.
A pop up window will appear with all the closed batches for that date. The pop up window provides detailed information about the batch, including the BatchRefNum, Seq, Date Opened, Date Closed, Errors, Transaction Count, and the Total Amount.
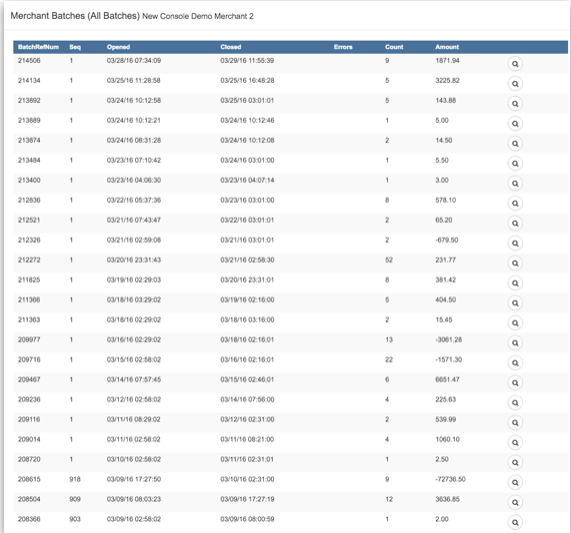
To view more details about each batch, click on the search icon.

You will then be taken to the batch summary page. This page displays the Card Holder’s Name, Card Type, Card Number, AVS, CVV2, Amount, and Auth Code by default. You can view more fields by customize the Batch Manager table. To customize this table, see the Batch Options section of this page.
